Hi followers,
I messed up and left my camera at my daughters today. I will get in in the morning and post for this week tomorrow.
Thanks you
Carol
Hi followers,
I messed up and left my camera at my daughters today. I will get in in the morning and post for this week tomorrow.
Thanks you
Carol
Hello,
I am feeling like we are to the dog days of summer now. The slow down and the feeling that nothing is really pressing is upon me at least. We had a good time this week on our visit to Philly and the Barn’s Exibit. I did use the audio guide that the museum provides and that did enhance my experience. I enjoyed all the images. I had forgotten that he collected so may African masks. That is a subject that I too love. Barns took so much care in how he presented the material that it was quite enjoyable. I found that by the beginning of the third hour of intense looking that my mind could not really absorb much more material. We really only did a through look at the top floor as the ticket man told us floor one was crowded when we started, so he sent us upstairs. Eric and I agreed that we will need to do a return trip. I was exhausted and slept really well that night. I feel really good about looking at art too- it is so stimulating. Because I was away for three full days this week I did not get too much done.
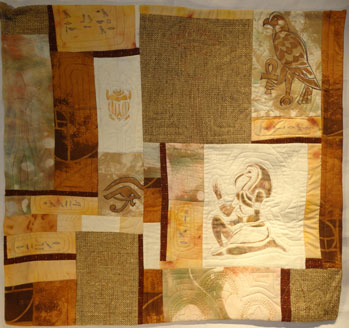
Progress Report: Thoth Eric’s birthday gift is finally finished. I will add the sleeve this evening and then give it to him. He can take it to his office and hang it next week. I like the stencil of Thoth and I am sure I will use it again. 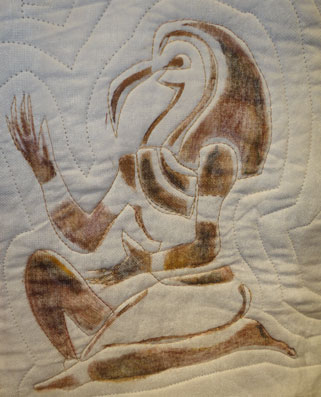
This second shot is of the eye is one of the Egyptian’s favorite symbols. I quilted in papyrus plants and leaves in the back ground as a part of my new push to add interesting quilting to my work.
This golden scarib is from an old stencil that I did several years ago. I have made it a habit to always create a new stencil or stamp in the Egyptian style for each additional quilt that I create in this on going series. 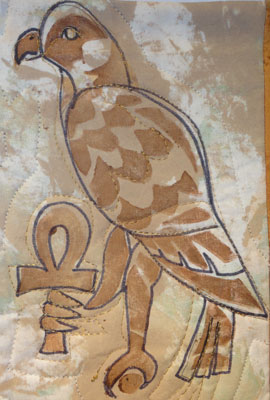 There seem to be many people in my life who find Egypt fasinating, including myself.
Wind Fall I stared this quilt weeks ago and I have only just gotten back to it. 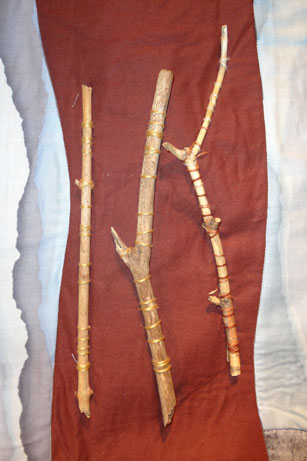 I wanted to do something for the “Sticks and Stones” show that was not rock related. We had some sever weather a few weeks ago and there were lots of little dead branches that were blown down after the storm. I had collected a pile as they were so smooth and simple in shape. I hand stitched with heave cotton some to them to the surface over the
 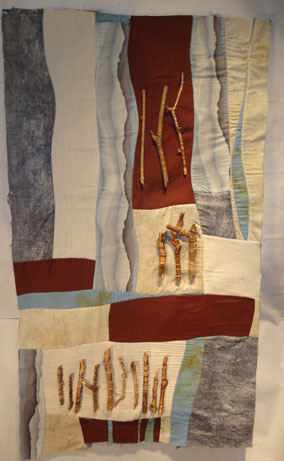 course of the last few weeks. They are all attached now and I will begin to quilt the piece this week . So the final will show up next time.
I hope summer is proceeding in a clam forward motion for everyone.
Keep Creating
Carol
Quilting By the Lake is over for one more year, but I am still in the happy after glow of seeing everyone. Week two brought with it new classes and some additional people. This first shot is of the mini mall that happens both weeks and is when the participants can sell their wares- books, patterns, posters and fabrics- to others at the conference. This event is always well attended by both faculty and the students as we all check out the special items our fellows wish to part with.
Week two is always as much fun as week one because I enjoy watching as new a different ideas emerge from my peers. 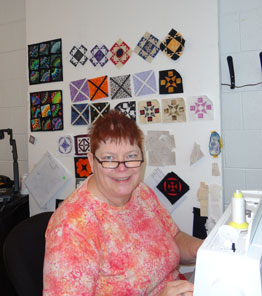 This shot of Sharron shows her 4.1/2″ Dear Jane blocks behind her. She is doing this quilt in six variations and claims that after she has worked out the “bugs” with the first block the others are easy.
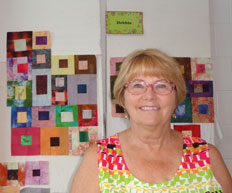
Debbie continued to work away on her scrap quilts and finished two more tops the second week.
 Everyone seemed to enjoy themselves in the Independent Studio class and produced lots of work. Linda ( on the right) quilted and completed this this beautiful orange and black piece. Betty worked very hard on this black, white red and yellow quilt for her grandson.
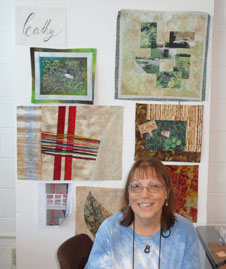
 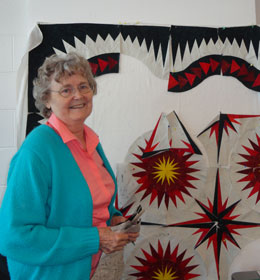 I think Cathy did a lot of exploration with her seven works that are pictured behind her.
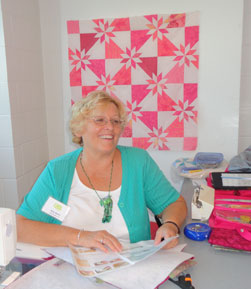 I feel the smiles say as much about the good feelings that carried us all home as any thing.
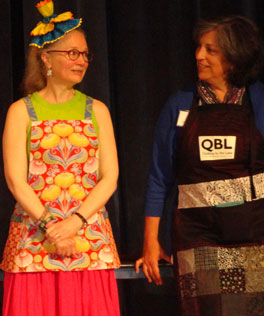 Apron Auction Last week there was an apron auction and this week that was repeated. All the teachers made or altered QBL aprons.
 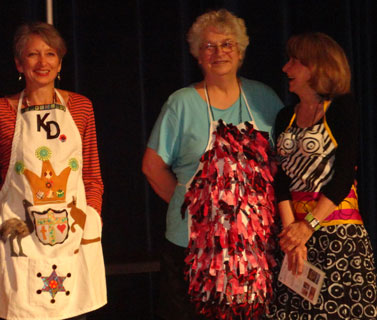 Cynthia Corbin skillfully hid a small piece of her work on the back of this fuffy/furry apron.
 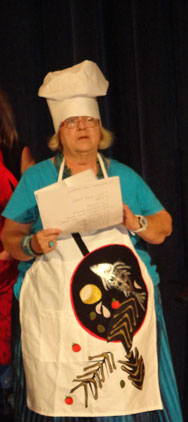 Rosalie continued her fish theme with fried fish this week. We all had fun bidding and enjoying the festivites at the end of the session.
Progress Report Exploration 1: I did some work myself too. 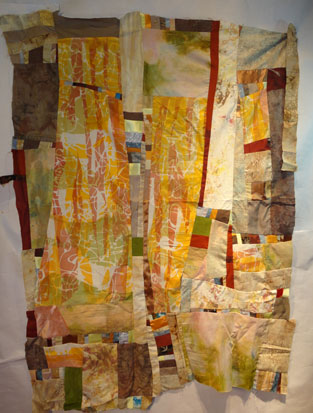 This new bit of exploration was more work with the curved line connections. I made the white, rust, orange and green fabric in a QBL 2 class about four years ago. The colors fit well with the rock and canyon things I am doing now that it has now found a home.
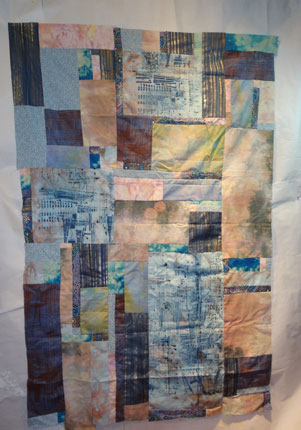 Exploration 2: Here I used a piece of Randy Keenan’s discharged fabric as my starting place. I had purchased it at the mini mall. I was also feeling a bit out of my depth with the curved work so I wanted something I felt comfortable with too. I started quilting this with silver thread this morning.
Exploration 3: This work too started with and older bit of Randy’s fabric. I purchased it last year and it got burried. It only came back to light when I was doing my cleaning in preperation for QBL three weeks ago.
Exploration 4: 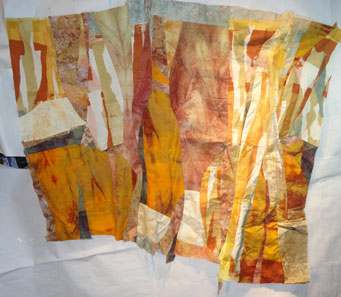 This is another of the curved line piecing / rock wall projects. I am not at all happy with it so far. I think I did too much in the way of curves and so it is very warped…… A new problem for me to solve before this will be seen again. But I am showing it to let you know I make mistakes, especially when I am trying new things. If one does not make errors every now and again then one is playing it too safe.
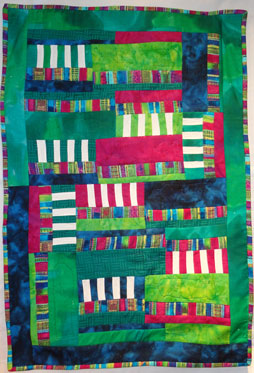
Good Habits This quilt was also started at QBL and I finished it this week. I think the completion was do to the small size as much as any thing. I challenged myself to create a block of a simple every day object. I chose a toothbrush. 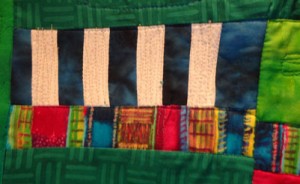 The white areas are the bristels of the brush and I added lots of line quilting to add to that feeling. The multi-colored area is the handle of the brush.
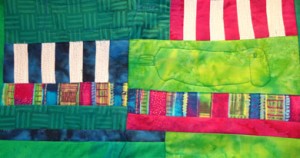 I quilted in toothpaste tubes in various stages of usge in the solid areas. I did have fun with this project and plan to make the idea a challenge to one of my design groups.
Do to a change in plans I will be away next week on Thursday so this blog will be posted on Friday next week.
I hope everyone is enjoying the bounty of summer and creating great things.
Hugs
Carol
I am home from Quilting By the Lake for the week end and it has been as fun and exciting as always. I helped hang the quilt show on the 12th. We stared the morning with a big empty gym and boxes of quilts and hanging units.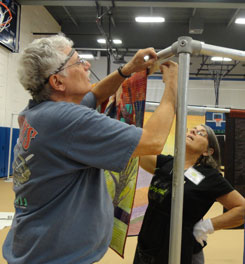 We asssembled units and started putting the work up. This shot is of Tony – a long time assistant that has followed QBL from Morrisville Community College, its last home, to Onondaga Community Collage, the new home for the last five years.
 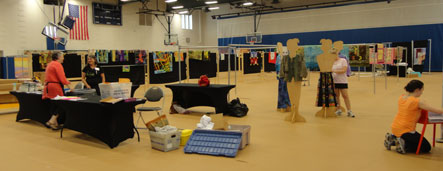 By noon the gym was starting to look like this shot. We continued to hang and make alternations as the day went on. There was a featured exebit of the work of one of our quilters. It showed her work from the first year of QBL to last year when she passed away.
  It was lovingly
  curated and hung by two of her good friends Debbie( standing) and Andy( on the ladder). Although the job was not complete we went home at 4:30. A new crew came in on Sat and finished the job.
I started giving away little doll pins that I now call Creative Assistants to folks at QBL years ago. They stared by my making a pin for a friend that was a copy of a petroglyphic that she had shown me the year before. The pins have taken on a life of there own and I enjoy making them over the course of the year and them passing them out to folks that I come in contact with. They are fun and a bit silly- they always make everyone smile. Some folks have very big “tribes” as they add a new member every year as the pins change each and every time I do them. 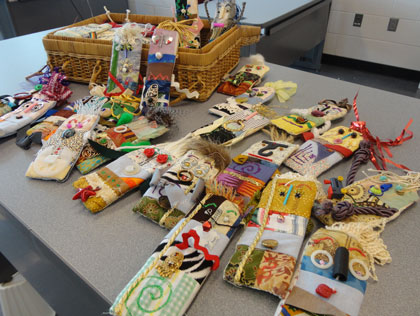 ( I will post a tutorial on how you can do it too after QBL is over. )
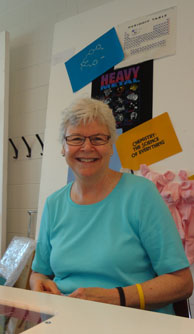

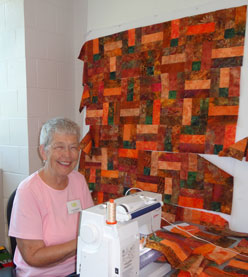
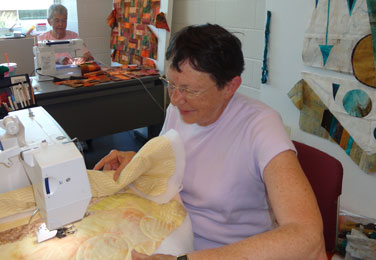 I spent my week of uninterrupted
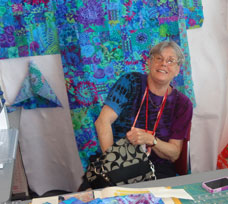
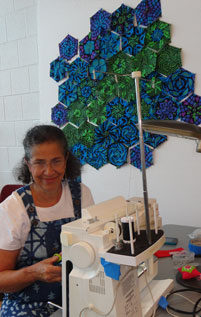 quilting in a class called Independent Study. It is unstructured and undirected. We all work at out own thing at our own pace. These shots of some of my fellow class mates gives you an idea of the wide range of actions going on. Everything is relaxed and enjoyable with folks working on finishing projects, to staring new directions. One gal even spent some of her time creating little pig dolls and enjoying the process. Most of the gals in this class are old timers. We all enjoy the atmosphere. I can not believe I have been participating for 31 years- but that a fact….. Only my Marriage is a longer relationship.
Progress Report
I did start lots of work too. Project 1 
I am continuing to use images from the trip to Idaho as inspiration. This is one from a rock wall at Dry Falls. I am still playing with strips of fabric that I can wad and fold over to create texture.
Project 2  This one is of a small crack in another stone wall. It was in direct sun light and the contrast of the rock face and the shadow was very strong.
 Project 3 This work is also inspired by a rock picture. I used a much more traditional way of assembling this one however without the folded textures.
I played silk that was fused to cotton. I sewed the leaf vains on to the surface and then cut the leaves out. I picked some real oak leaves( deep green) and used them as inspiration. I learned that the side one puts on top when sewing in the vains is the way the leaf will curl when you let it hang.
The last event of the week at QBL is an auction of aprons that have been altered by the teachers. The money raised goes to the scholarship fund . It is always lots of fun and we all get a bit silly. This time Rosalie Dace quilt teacher from South Africa, really went over board as she dressed her part. It seems the IRS in response to her inquires about paying taxes had written her a letter. On the back in pencil was a message that told her “she need not pay any taxes on any fish that she caught or sold”. So she dressed up in wades, a fishing hat added a net and poll to illistrate her story. Also shown in the photo are Cynthia Corbin, Hollis Chatelain and Katie Pasquini Mastopust.It was a fun week and I look forward to more of the same this next week.
I hope your week is as creative as I expect mine to be.
Hugs
Carol
Hello,
I feel we have reached the slow days of summer when Mother Nature really does her magic. I have noticed on my walks changes especially in the trees. Hickories, pines and oaks all have immature versions of the seeds to come in fall. Because of all of the rain we have experienced here, I think the apples will be really big this year because the green ones on the trees now are already bigger then gulf balls. Nature provides me with a visual feast each day. 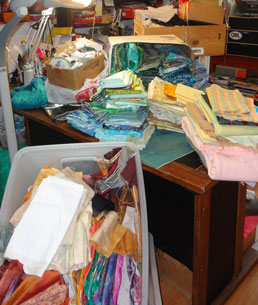
I am getting ready to attend the Quilting By the Lake conference. I so look forward to seeing my friends and to getting stimulated by lots of new ideas and thoughts about the art of quilting. In preparation for that work I had to do a bit of sorting. One thing lead to another and I ended up pulling all the fabric out of the closet and refolding and stacking it. This shot shows the job as it neared completion. As you can see I have lots of fabric. This activity not only cleaned up the shelves, and sorted out the material that I need for my projects, but it also made me realize I do not need to purchase anything new. I hope I can stay to that resolution over the next two weeks while I am there and tempted by the fabrics of the venders. I am doing two weeks of Independent study this year and I plan to keep working on the Rocks and Canyon series. I will allow my self to find other ideas as well. Please be aware that there will not be any posts for the two weeks of QBL. Then we plan on a little vacation so this will be the last post until Aug 8.
Progress Report: Anastazi Ruins
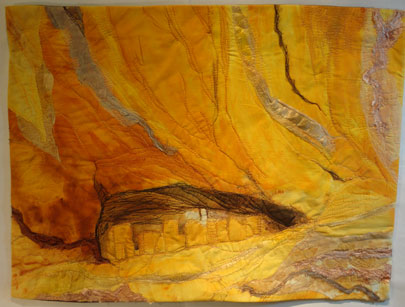
This work is complete now. I have really enjoyed putting the silk paper into this work. It makes the feel of the flow of the rocks really work for me.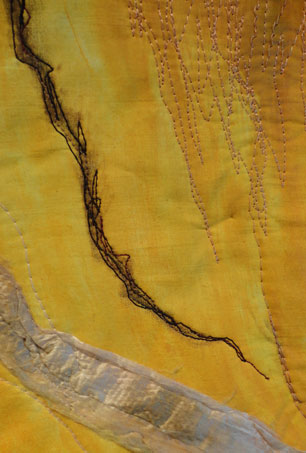 I liked doing the free motion work to add texture to the surface too. The other thing I tried here and on the Sunny Crannies quilt was adding torn strips of satin to the surface. The strips were slender so they folded in on them selves and they flipped over that also added to the textural changes that were created.
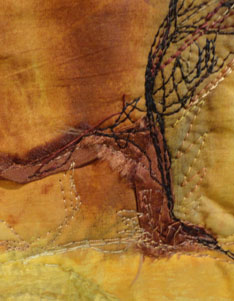
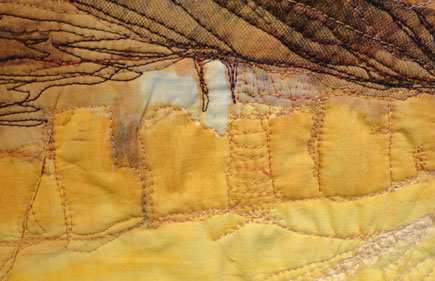 I ended up not using the painted unit I posted last week on the ruins. It was just too much. But I did add nylon net to the top of the cave area to help with the darkness.
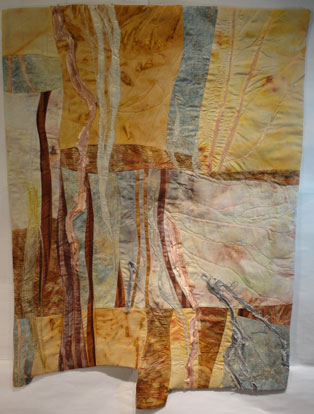
Sunny Crannies
This quilt is a part of the Rock Face series. I really seem to be fascinated by the surfaces of road cuts and cliffs. This one came from on of the photos that I took in Idaho a few weeks ago. Here I went back to the free cut method to put the work together.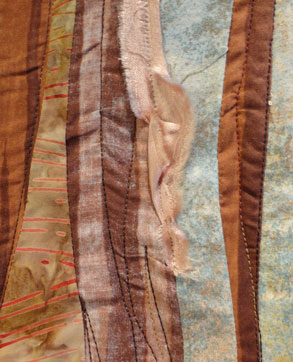 Rocks do not break in continual strait lines most of the time so the free cut is the only way to get the correct feel.
This shot shows that I also turned the brown commercial fabric over and use the “back” side to get another tone to the surface.
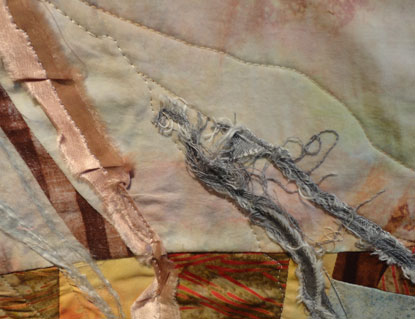 I used some of the fabric that Marty and I discharged in this quilt along with some slender torn gray jean fabric as well. I really like this plus the satin surfaces on the work. Finally I used more of the silk paper here too. This piece of silk paper has some glitter and gold added to the silk as well as the color. I look forward to teaching this technique with the Quilt Exploration Group in September.
Rounds
This project is moving along nicely for me. It is changing under my finger tips however, but one needs to be open to that as it happens. All the circles are stitch down now and it has been washed so there is fraying of the shapes. I plan to slice the top and invert one or more to the slices before I reassemble it. I also want to add so yarn appliqued to the surface to add more texture. I will then have to see what the quilt tells me to do.
Thoth is the Egyption god of writing. I intended to complete this quilt for my husbands birthday. That happens to be today so I will not make it. But I am sure he will accept it later. He is an English teacher and worked on his collage publication called ” Thoth” so this seems like a good idea to me. I made the stencils- Thoth, the Eye or Horis and the Eagle mouths ago, but never put them together until now. 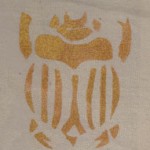
The scarab stencil is even older. I added the scarab after the whole top was assembled as I discovered that the area needed an addition.
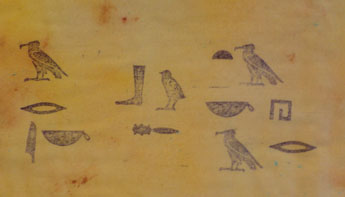 I enjoyed adding the Hiroglyphs to this project too although I did them before I assembled the top. I have had this set of stamps sense I taught school and I used them with the kids. Here I spelled out ” Eric the Teacher” using the Heiroglyph guild book.
I keep working on the beading work on this quilt. I am just about ready to do the quilting now. About three more evening of watching TV should to the trick to finish the beading step. Then I will begin the hand quilting.
Here again I made my background using the free hand cut method. I did the cut and flip thing on this background too. The red circles are just pinned to the surface now . When I get the placement exactly were I want it I will satin stitch them down and begin hand work. I imagine it will be a while before this work reappears again, as the work I do at QBL will probably capture my attention for a while. I wanted to have this work started because I have made all the “add ons” and I do not want to forget the direction while I am away.
I will look forward to posting again Aug 8.
Keep Creating
Carol
Hello,
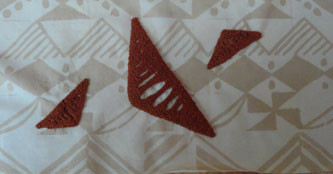 I hope this day is full of delight for everyone. We will have family over for a cook out this eve and later enjoy our local fire works. This week was a full as they all seem to be at this time of year. Starting a new mouth always means meetings for me. The Quilt Exploration Group meant and was lively as ever. Angela continues to work on her Ta-pa Cloths series. She prints the fabric in neutral colors and then embroiders another ta-pa pattern on top. The dark brown image is done in French Knots.
 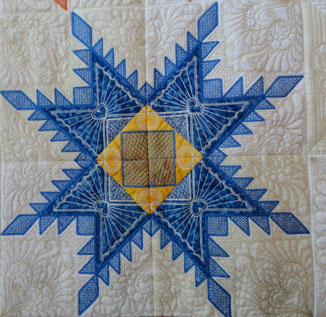 Sally really has gotten to know her new embroidery machine this year. She has been creating feathered star patterns in fabric and thread all winter. The fabric is yellow and the dark blue in this star- the rest is all created with thread!
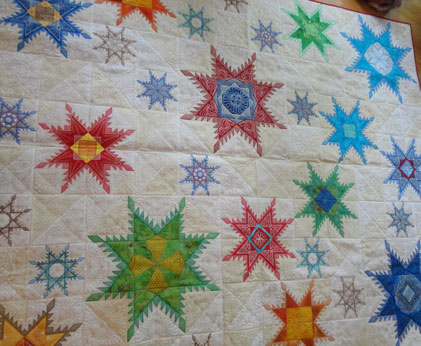 Even those many points. There are 36 stars on this quilt and I just kept looking and looking. It is so awesome. Not only were the stars powerful so too was the quilting in the white area. Sally did an excellent job putting it together too.
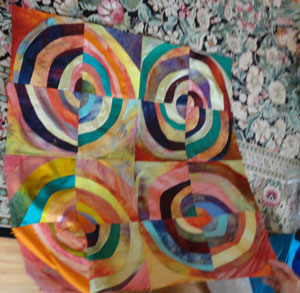
I am regretful that this shot is so poor- but the colors in Noel’s silk circles are so powerful that I had to present it non the less. Hopefully I will learn to check the image after the shot instead of assuming it is OK.
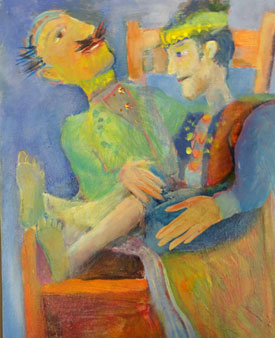 The Diva meeting was full of new ideas too. Susan is collaging/painting pictures of some of her puppets. She wants to create depth with organza as well as paint. I am sorry that the photo does not show the fact that the arm of the puppet on the right is made of tin and sticks out from the surface. And All the suttelness of the organza is lost in the photo.
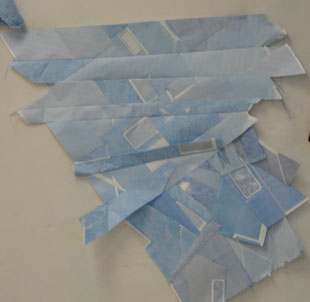 Alice is working on a paper construction for a recycle show that she wants to be part of. She has created this ” water unit” all out of privacy envelopes. The paper is surprisingly strong when it is stitched together even though she still has only one layer. She held up envelopes with green and some with black images on them for use as trees and rocks. I hope we get to see the finished work.
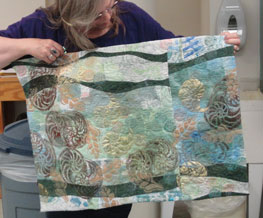 Sharon grabbed my camera and took this shot of me holding up my Fossil Bed quilt.
One of my followers asked if I was worried about copy wright of my images. That topic also came up in the June/July issue of Quilting Arts and Jane Da’vila provided a little section about water marks on page 72. ( There is a survive at Digimarc.com if you are interested) Taking that action would protect one’s work. I am always very careful to ask permission about shooting the work of my fellow artists and there are times when they do say “No”, witch is there right. But my feeling about my images is a little more open. I do not feel anyone can really copy my work and if they are so in need of my material, that they steal it – I hope it serves them well. That is not to say that I do not value my work- I do. But I just do not choose to spend my energy in that fashion. I prefer to keep creating new things and for the most part I have enough. For that I am truly Thankful! I hope this source helps anyone who needs it.
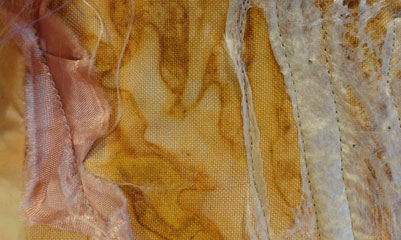
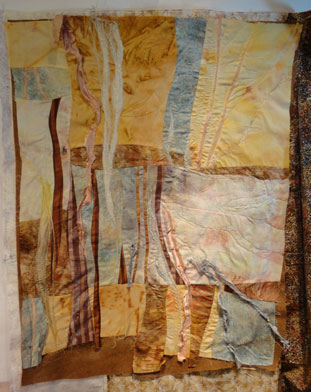
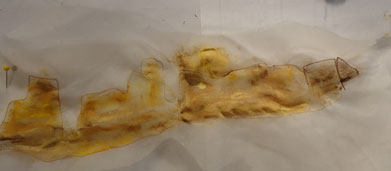 Progress Report: Rock Face This first shot is a close up of the quilt work. I am using the silk paper I created with Ethel to add texture and color to the surface. This image also shows the rust dyed fabric in the background and the torn silk I stitched on top for additional texture. I used some of the fabric from our discharged day with Marty in this work too. It took me a long time to decide how to go about quilting this work. But I am quite excited about working on it now.
Anastasie Ruin This work got attention this week too. I tried painting the actual ruin on organza- and I am not sure it works. The scale is off some how. I plan to make a second organza unit and add it on top of the work. 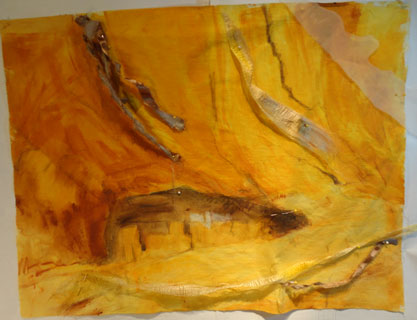 I am going to embellish with the silk paper an strips of fabric here too. Again I am filled with doubt about where to go with the quilt step of the work. But I think that if I get the dwellings defined then the rest will take care of its’ self.
Untitled
Noel’s quilt from the QEG’s meeting just would not leave me mind so I decided that I needed to play with circles too. I though I might mix them with the raw edgue idea I was playing with a few weeks ago. ( that work , although not tossed yet – is still in a questionable state) I also played with several different textures here- silk , velvet and cotton. I hope I am not falling into one of my typical patterns of trying to do too much in one work….. but I guess only time will answer that. I though I was making a back ground for all the black and red fiber rings I have been creating- but this is not the home for those creations.
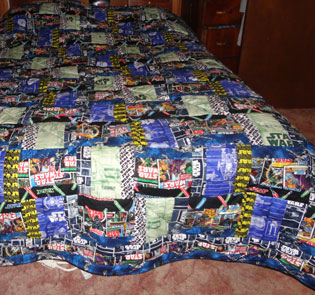 Star Wars Quilt I did finish a little practical work this week as well. The Star Wars quilt is twin size and for my grandson. He picked out all the fabrics and although I think it is busier than I would have selected, he is delighted.
I hope the holiday creats delightful memories for all.
Keep Creating
I am as busy as ever, but I have taken time to listen to the birds sing and enjoy the beauty of the summer season. Yesterday I went off to visit with my friend Ethel and we used the beautiful weather to spend a day dyeing out side. This shot shows one of the fabrics I dye painted. I can still feel the influence of the rocks and the water on what I am doing. Along with dyeing is the batching step. This small shot is of some of the fabric under plastic so it will not dry out. The last step is the rinsing out- a project for later today. I worked on 10 pieces of fabric so that will take me a while I am sure.
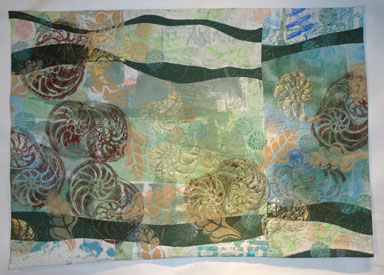
Progress Report: Fossil Bed This quilt is complete now. I have enjoyed doing all the stencil work here. The last bit of embellishment that I did, was the addition of gold foil shells and then the little round stamps that I created at our last play day in May. 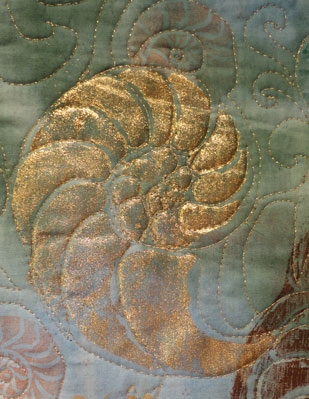
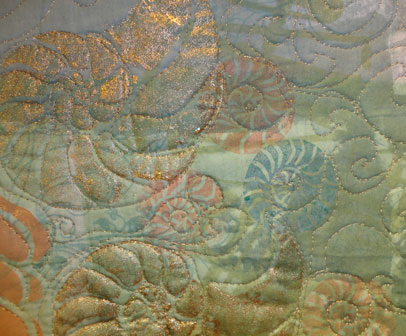 In this second closeup the circle stamps are shown in orange and blue along with a second foil section. I also did quilting in gold thread. Susan told me that she want to see more images of the finished surfaces and so there is a third closeup of this quilt.
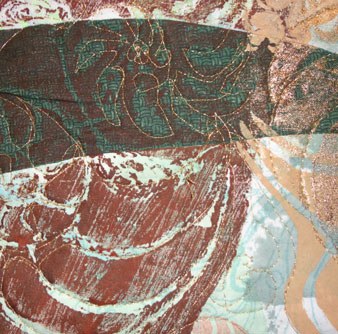 This last closeup shows the brown stryophone stamped area with the quilting in gold too.
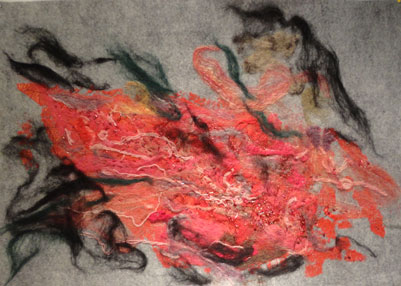 Red Nebula I think that I am done adding to this work. I need to decide now how I want to finish it. One of my works is off being framed now. I may want to do that to this work as well. I will know better when the framed work comes back to me.
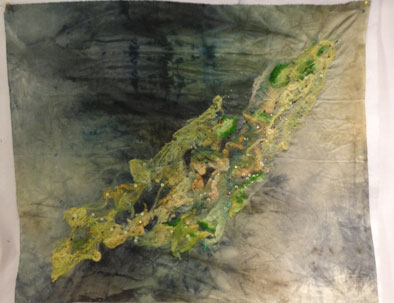 Green Nebula I have only just started my hand work on this second felted work.
This piece has a hand dyed fabric backing. I am enjoying that hand work as always and this time I am using some antique pale green sequins on the surface.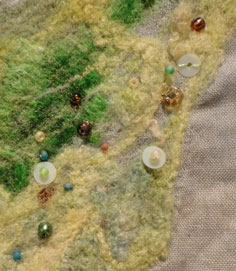 The sequins are from my great aunt’s sewing box.
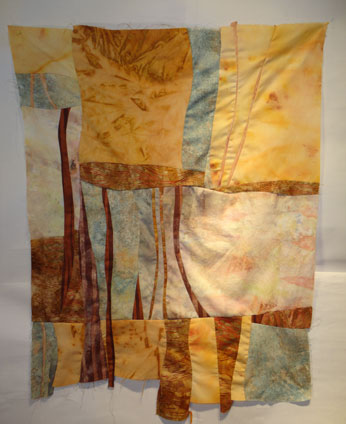 Rock Face
This is my newest top. I got so inspired by my trip to Idaho and looking at all the rocks, that I just had to do a work on that subject. I got to use my newly developing skill with slender curved inserts too. I think this is just the start of a new series.
I hope that summer is treating you well and that you are enjoying the great out doors .
Keep Creating
Carol
Hello-
I discovered this old post while I was doing a little house cleaning this week. Please note the date at the top… as you can see this is old material. When I talked with my web master, she suggested that I post it even though it is old- so I doing so. Please feel free to skip it if you are not interested.
Thanks
Carol
************************************
Hello to all,
The weather has really turned colder the last few days. I put another quilt on the bed and left the window open, but I do not feel I can do that too long. We have had a bit of rain around here as well. I enjoyed the Diva meeting before I went off to Maine. 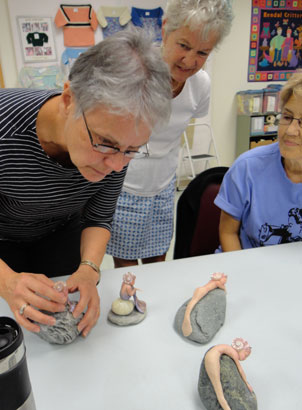 Donna is showing off her fimo doll creations in this picture. She collects the rocks from the shore of the lake and then builds the little dolls to just fit on them.
  Another gal in the group showed off her newest book creation. The pages are all made from fabric with the images collaged and printed on them. I feel really happy to be included in such a creative and divers group of gals.
I am getting ready to go away again- this time to Idaho with my friend Marty for two weeks. I will try to post some photos next Thur -but if I can not figure it out I will send a bunch when I get home. I have lots to share now though. The class I taught on card making went well. Everyone went away with at least four cards and one gal had 8. They cut their stamps from erasers in the morning. Stamped them on fabric. Them made cards by combining the images with bits of ribbon, paper and more cloth all afternoon.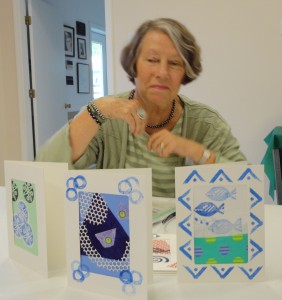 One gals in the class said she liked her work so much that she was going to take it home and frame it instead of sending it through the mail.
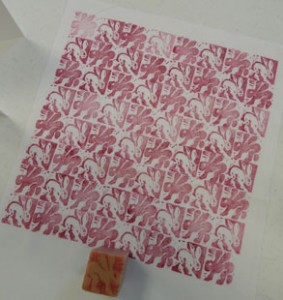
Elinor cut both ends of her eraser into a rabbit pattern- one positive and one negative. Then she created yardage by alternating them when she printed the images.
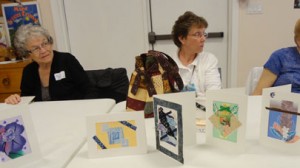
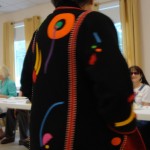
 I really was quite pleased with how well they did there work. Then at the quilt group meeting the next day they all brought them back and proudly showed them off. Marty also showed off her new coat at the show and tell portion of the meeting.
I hope everyone is enjoying the start of the fall season. I always get excite about quilting as the weather cools down and I feel more confined to the house.
Keep Creating
Hugs
Carol
This extra post is a continuation my saga for the last two weeks. This shot is of the sun set from Kay’s deck in Wenatchee Washington. I love how the light truned the rock to red.
I left off last time with the Iron Quilter experience. That was followed by the meeting of the QuEGs groop. Because of the play day on the Friday before the meeting was a big show and tell of what we had done.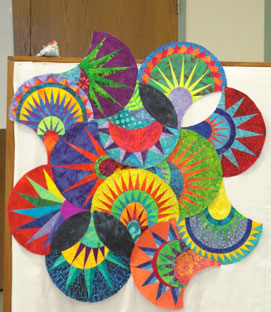 I followed that with a drive to Ithaca to meet with the Diva group. Ruth had been busy with her American Beauty/Clam shell quilt. All the ” blocks” are different and full of her love of color. She plans to keep the shape irregular and I think that is wonderful.
 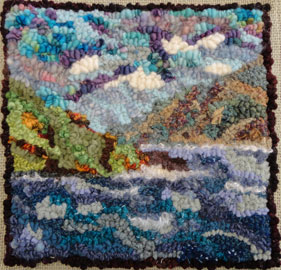 Sandy wowed us with her newest hooked creation. She used strips of wool and she mixed yarn with them to create the colors she wanted for this landscape. Great solution to a color problem.
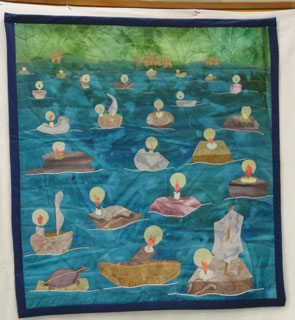
Liese created this quilt for the next show at Kendell. The theme is “Ship Ahoy.” She opted to commemorate her memory of being a Girl Scout leader. One of her favorite memories was of little wooden boats made by the girls with candles that they launched on the lake the final evening of their camping trip. It made many of us envious and we want to try it too. 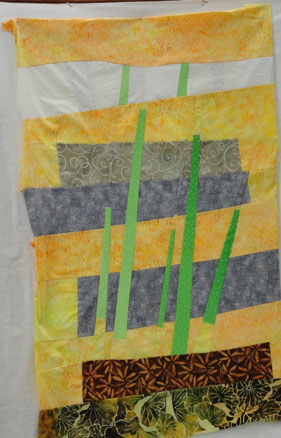 Annie created this spring growth piece. I like the show drift in the back with the green shoots so full of life in front. I hope it is completed for the fall show.
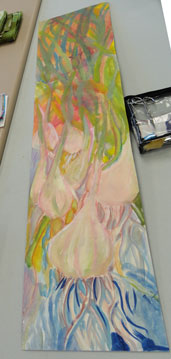 Susan, now back from her home in Florida, is finding inspiration from her garden. She is limiting her palet and mixing the colors she needs for her images. I think she is very successful with these leeks especially in this long format.
I then flew out to visit with Marty. She and I spent a sunny afternoon discharging with bleach. It was specially exciting because we used hand dyed fabric so the colors from underneath were often a surprise. We tried using the fabric in wadded piles on the ground and some on the line. We felt we had more control of the results when we used the line method.  Then the next day we dyed fabric. Marty was trying for browns and this shot of the tub looks like she was successful- but the dye was a bit old and it did not take well.
 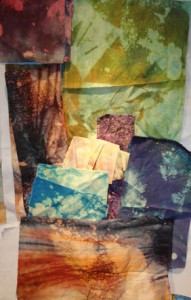 I am still delighted by the stuff I came home with and look forward using it. This photo is of some of the new fabric pinned to the wall when I got home.
Rosalie Dace joined us on Saturday. We celebrated Marty’s Birthday on Sunday with a picnic on the deck. 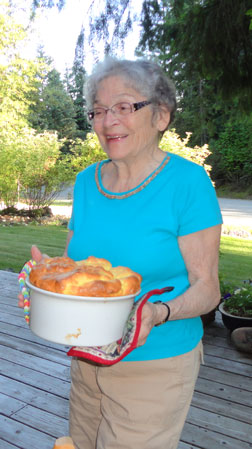 Marty made a great souffle that we all enjoyed. Then she opened her gifts.
 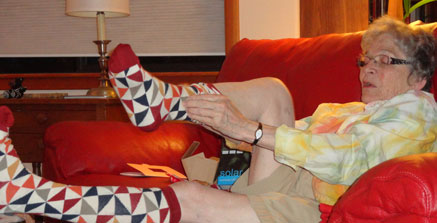 I love the socks sent to her by her daughter- so very operate for a quilter. They will keep her toes worm this winter.
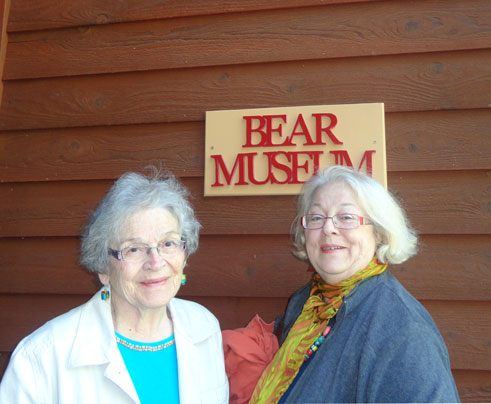
Marty’s home, thanks mostly to her brother, is also a Bear Museum. This means there are bears everywhere a fact that is not without its hazards. 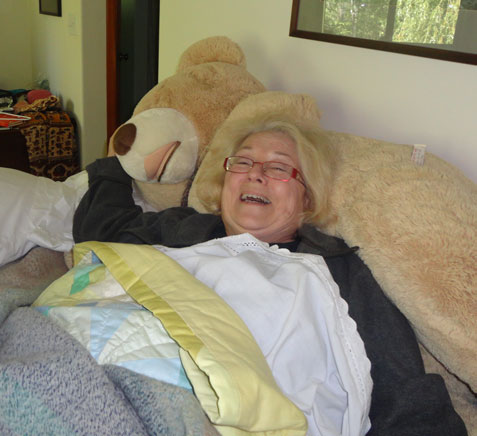 Rosalie found that she had a bed mate when she went to her room. Bob,the big bear, was very accommodating and allowed her to rest her head on his abundant stomach.
We drove to Wentchee see Kay Hall and go to a lecture on geogely. Kay is a quilter with a love of texture like myself. She uses a lot of beading in her work as this great little piece shows. 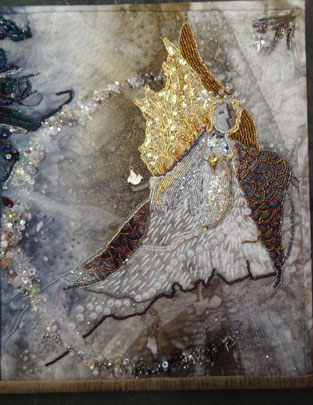 “The figure was in the dyed cloth,” she said. “All I had to do was embellish it.”
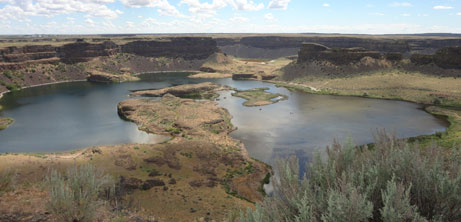 This shot is of Dry Falls National Monument. It looks so much different from my last visit do to the fact that the day was sunny and there was lots of rain this spring so it was very green.
I had a wonderful time on this visit. I have a whole new pack of pictures and tons of new ideas as well as fabric for new works.
Keep Inspired and Creating
Carol
Summer is really upon us, although it has been very rainy and cool here in the north east. I can not believe that Summer Solstice is tomorrow. Time is flying before me. I have been busy with events almost every day for the last two weeks, so time really moves in my point of view.
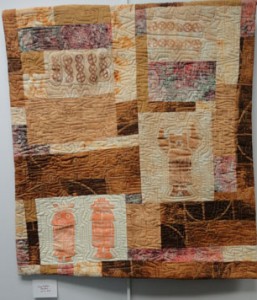
I started out with the hanging of my solo show at the Maxwell library. There are 17 piece in that show titled “Earth Tones” , many have
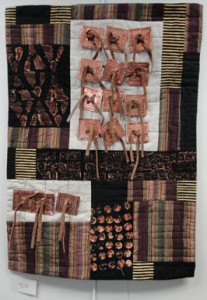
never been seen before in public with a few works from the “Goddess” show as well. The work spans over four years and it was a good chance for me to reflect on how much I like and use browns and golds. This show also shows examples of the wide variety of techniques I use in my work. ” Know Now” for example has copper and leather added to the surface with some dish washer soap discharged work in the black areas of the top. “Rusty Rings” on the other hand, is a rust dyed silk with embroidery on it.
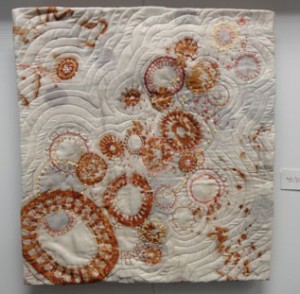
I also added dark fabric below the white silk to make “shadow” circles appear in the quilt.
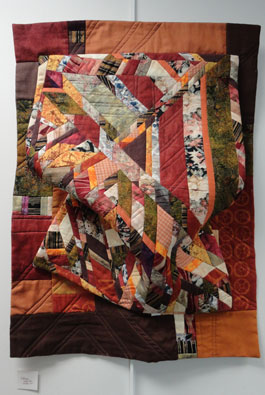
“Collapse ” is from the Warped Work series and is one quilt on top of another with snaps to allow for a warped surface of the top quilt. I did five works in this fashion to explore folds and shadows with my work. I enjoyed this series, but no one seemed to understand what I was doing so I stopped working in this direction. I may yet go back and do further exploration with this idea later.
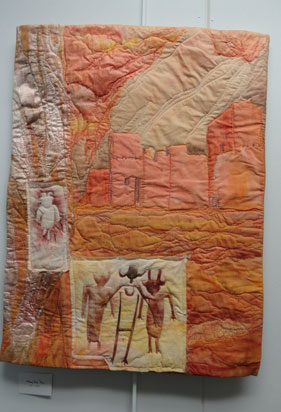
“Mummy Cave Ruins” ( see last May 31 posting) along with Ancient Voices and Rain Run were also a part of this show. Putting up this show was fun, but it took me a long time to do the job. I will be taking it down in a week.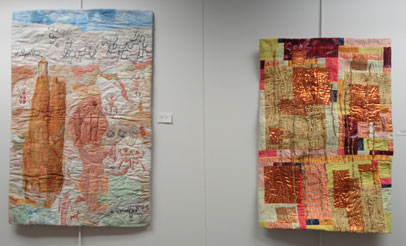
The day after that was a Play Group event were we all played with stamping. This picture is of cut eraser stamps that I taught. The stamped image to the left shows how one can make a really big image by making one of your elements warp around the four sides of the eraser, so it flows together( the white line from all four images.)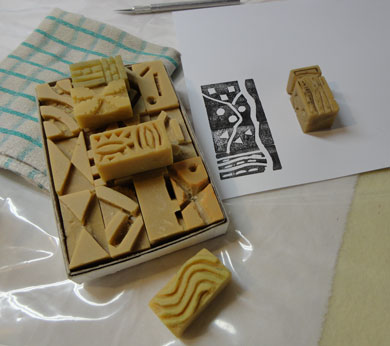
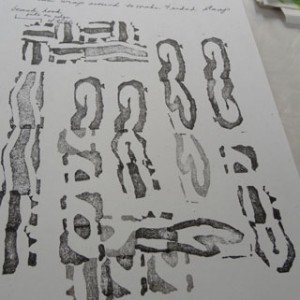 This shot is of Linda’s exploration page from her eraser cuttings.
 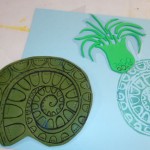 Then I showed everyone how to use ” fun foam” to make stamps and apply the images to clear plastic so you can easily see were you are placing the stamp.
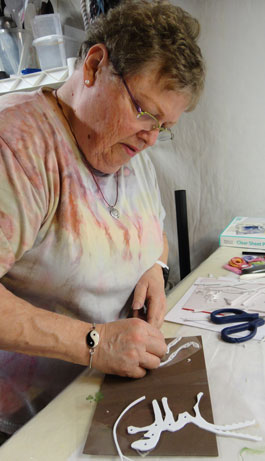 Liz made some fanciful shapes and she used a whole punch to add detail to her work as well.
 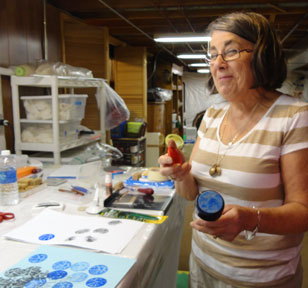 Then Corinne demonstrated how to cut on a circular form with linoleum cutters. The shape does seem to effect the style and way one thinks about the images.
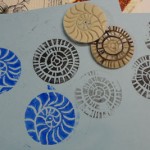 I cut two and stamped them both. It was quit enjoyable. I think I will use the stamp, printed in blue here, on my Fossil quilt as it resembles a Trilobite.
The next event in my life was a trip to Rochester to the Genesee Vally Quilt Show. There are 600 members in that quilt group and the show was very enjoyable. While there I participated in my second Iron Quilter event. There were 19 quilters and in 3 1/2 hours we all produced a quilt that was at least 24 inches on a side. The topic, told to us at the start, was “Vanishing Act”. 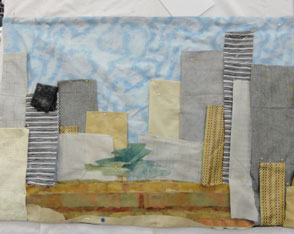 We all rushed to the table of fabric provided and pulled stuff from the collection. I started pawing with no idea at all about how to show this concept. But I came across someone’s discarded block with two small elephants printed on it and I had my brain storm. I was off and running then. This first shot is of the work at noon when then made us all stop for lunch. At this point I had fabric ironed and pinned to the surface, but no stitches yet. Back form Lunch and two hours later and we all had a piece done.
 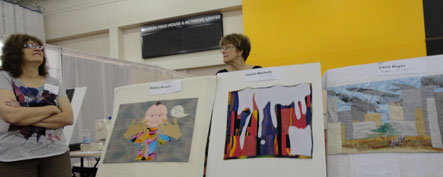 I was exhausted as were most of my peers.
The “Vanishing Color” ( center quilt here) won second place.
I neglected to take a photo of the winner.
My quilt titled 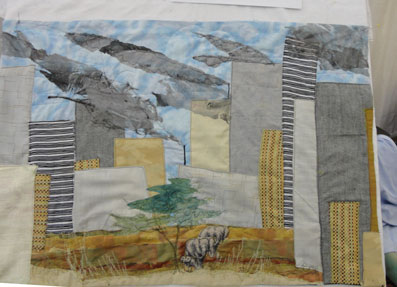 “Vanishing Environments” is OK for a work with limited time. I learned that I can really re-lie on my machine drawing skills to pull me through when time is short. When asked if I would do it again- sure I would. It is fun to stretch every now and then.
I have lots more to talk about, but find I am getting tired, so look for an extra post in the next day or two.
Keep Creating
Carol
To Be Continued