Winter Wonder Dec 26, 2013

TreeHello,

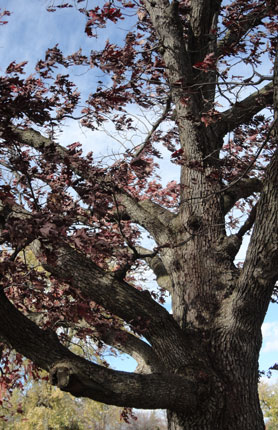
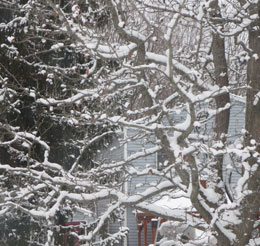
I hope the holidays are treating you well.   I am enjoying all the beauties of winter.   We have had lots of little snow storms that seem to out line the trees in dramatic fashion.  It has been cold though and I have cut my walks short on several occasions.   I am still enjoying my new camera and learning how to use it correctly.  I hope everyone is enjoying their new toys too. Everyone seems to be very busy with family and so I have not had any meetings or  art related events this week.
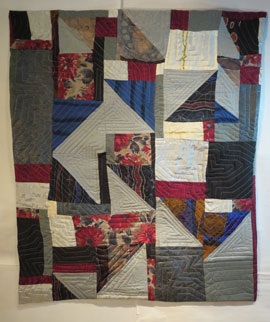
 Splits 27.5" X 33"
Splits
27.5″ X 33″

Progress Report: Splits  I am delighted with how this quilt came together.   I did not have a firm idea about how I wanted to quilt it when it was finally peaced together.  I spent some time looking at the quilt and decided to emphasize the gray triangles.  I used silver thread and filled in the shapes.  When that was complete I  decided that I did not want to use the silver thread through- but still wanted a little sparkle.  So I switched to gray thread for the next reflective outline of the gray units.  I did this action around the shapes twice and then switched back to the silver thread for the next pass.  I did this same pattern of thread color all the way to the end of the quilting process.Slpits close up 2This first close up shows some of the white silk with a gold Slpits  close up 3pen line on it.  This section also shows the rose print with the quilt patters crossing them.
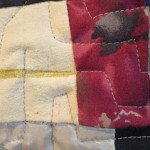
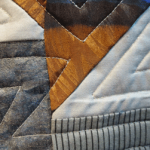
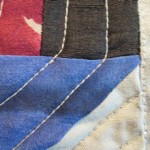
This second close up shows one corner of a silk and gray block that started this project.  On the left is some of the ground cloth material that I also used in this quilt.     Slpits close up 3
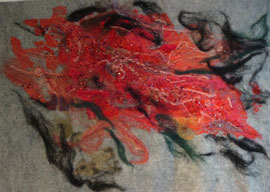
Red Nebula  18" X 24"
Red Nebula
18″ X 24″

Red Nebula

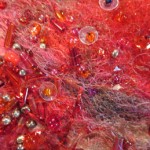
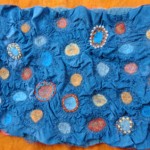
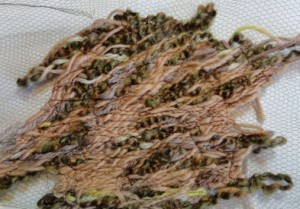
This is my second felted piece.   I have been adding beads to it for the last few weeks and it is now complete.    I want to frame this one just like I did the first one.  Now that the holidays are over I may get them both done.    This first close up shows the center of the piece.  I used  glass and metal seed beads and bugle beads as well as a few squiens to decorate this one.   I felted in some metallic  red threads too to add more sparkle. Red-Nebula close up 1
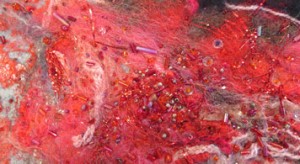
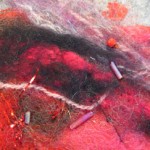
red nebula -close up 2  I enjoyed working with all the add-ons  and  the many different threads that I used here.  Red-cl3  I also added some hand work stitches too.
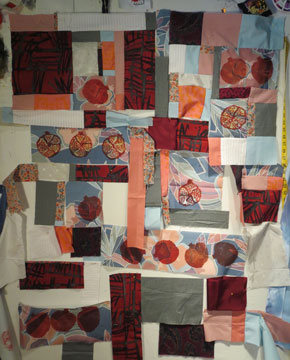
Pamagrante


Pomegranate    I continue to work on this piece.  I think I started out with too many pieces of fabric and  took some out this week.  I am not worried about using them, as I have a second piece in this series and I can use the extras there.


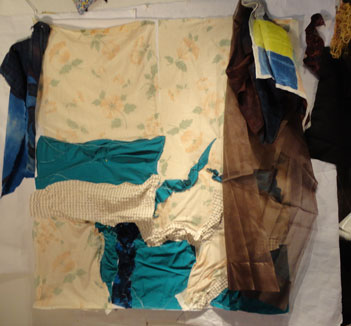
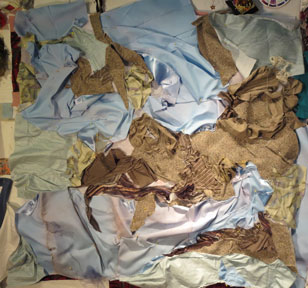
Foundations VII   I started a new piece Foundations-VIIin this series this week.  I laid out the buckram in the size I wanted  then placed several shades of blue on top.  Then I  added a parts of an old wool jacket, old silk shirt and one of my husband’s old shirts to the surface.  I do not let the type of fabric make any difference if the color is what I am after.    I look forward to starting the free motion work on this one tomorrow.  When that is done I will build on top with more layers of fabric and yarn.
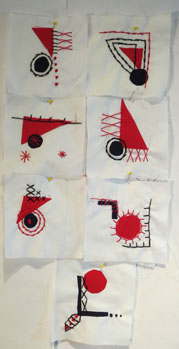
Daily'sDaily’s

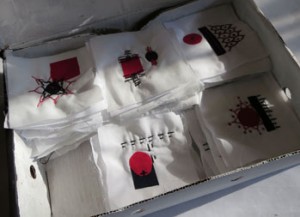
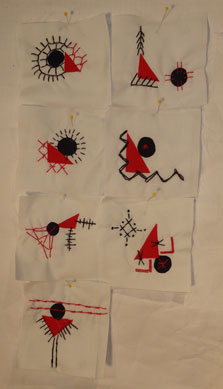
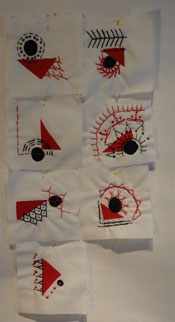
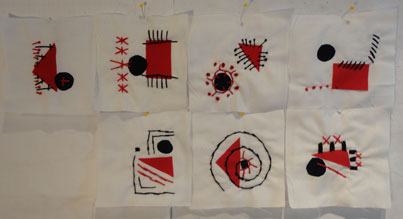
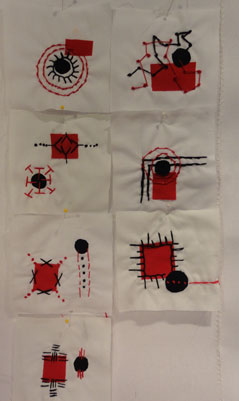
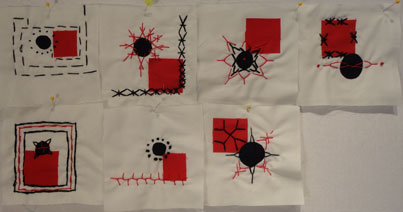
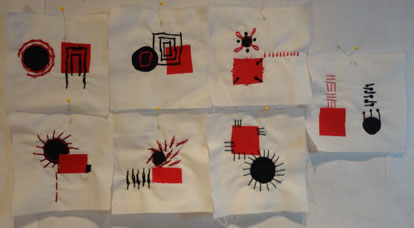
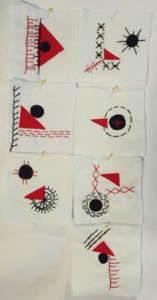
The last five squares with red triangles and black circles were done this week.  Then I started the red circles and black L’s.  I cannot believe I have been doing them for three mouths.  I sure enjoy the challenge.

Enjoy the cold and snow.


Keep Creating

Carol
 

New Camera Dec 19, 2013

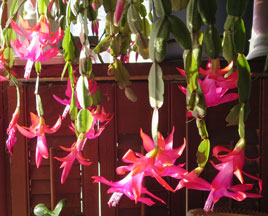
Christmas-CatusHello,

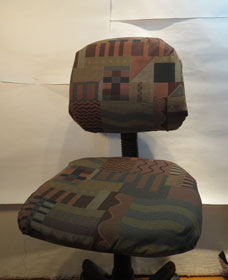
As this picture shows I got a new camera.   When it took the broken one to the only shop in town, I was told it would be $25.00 just to look at it before the repair started. What with the cost of new ones be as cheap as they are now days, I decided to go that route.  It is a  Cannon Power shot and I am quite pleased with it.  I would have gone for the same type of camera as my old one, but as the local photo store did not carry Sony’s, I did my research and selected this one instead.  ChairThere is only one camera store in town now and I am sorry about that.  When I was teaching photography there were four shops as well as all those  funny little booths in parking lots were you could take film to be developed and get yur pictures in an hour.   Times have changed. 

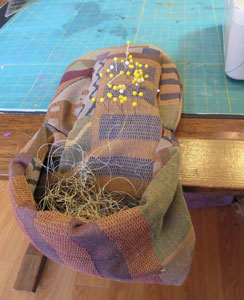
I did a few house hold things in the studio this week.   I covered my rolling chair back and seat as it was looking a bit shabby.  Then I got busy and made a hanging waste/pin cushion unit for next to my machine. Bag  It is made  from the scraps of the chair- the other side of the fabric.   The pin cushion part is filled with sand to give the unit the weight it needs to stay on the desk top while I stuff the thread and fabric bits in it as I sew.  The sand helps keep the pins sharp too.   There is a hand bag handle in the front of the bag to hold it open. That is also why the shape of the unit on the desk top is arched; it fits over the opening if I need to close and transport it.    This is not my idea- I saw it some were and made up my own version.  

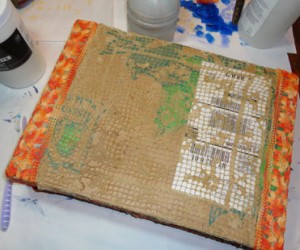
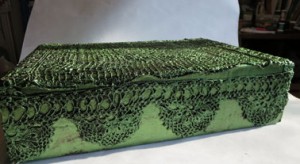
BD12Box-Project The third bit of housekeeping was a altered box.  I needed a place to store the Daily’s.   I took a substantial corrugated cardboard boot box I had and glued it all over with bits of old lace.    Then I painted it with black gesso on the Exterior BD19inside-boxout side and white gesso on the inside .  When that was dry I applied green Lumiar paint to the surface to highlight the lace.    I now have a very attractive box for the storage of the Daily’s. 


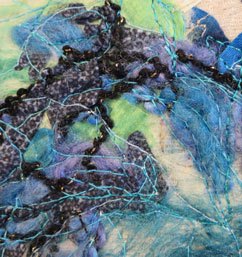
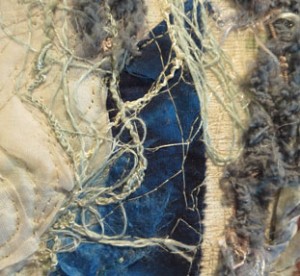
EbbTide-FoundationsV-clProgress Report: Ebb Tide- Foundations V   As the new title suggests I now have a name for this work. I am having a delightful time with this piece.  I have tried lots of ways to add texture to this top.  The first shot shows  roving and yarns that I stitched to the surface. Ebb tide close up 2   Then I tried using a course sort of thread(the sea green).  There is also some chennelle yarn (gray) that I chrocheted to add more texture in this close-up.   By using the buckram as a foundation there seems to be no limit to how much sewing machine work one can add on top and  I really love that.

The third close-up shows organza that is wadded as well as old lace.   Some is captured under the organza and some is free.Ebb tide close up 3

There is also some orange trim that I cut and added to the surface shown here.    All the textures come from the images I saw in  a second photo of a tide pool that I took in Maine last summer.   This piece will surely be finished by next week.


Cascading-Foundations-V Cascading -Foundations VI    This little piece is also near completion.  I mixed silk paper and an old silk shirt and a failed silk scarf  in this work.  I think is needs only a little more free motion work and then I can paint the back.
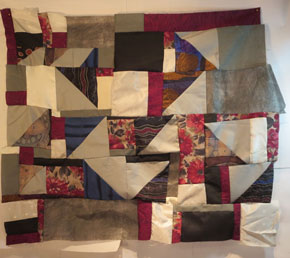
SplitsSplits  I started this top this week.  It really flew together under my fingers- almost had a life of its own.  I had premade the diagonal cut blocks before and have tried twice to lay out an effective arrangement. I am delighted with how this finally came together.  I will need to think carefully about how to quilt this one.


 Daily'sDaily’s   I can not believe I have nearly finished my fourth mouth of Daily’s.   There are only a few more pieces with black circles and red triangles in the box.  I will need to plan my next layout this week.

Keep Creating

Carol

Dec 13, 2013

AliceHello,

I hope  holiday preparation and events are just what you want and need.  At this time of year it is so very easy to get drawn  in to doing too much.  As I looked at my calendar for this week I realized there was an event of one type or another every day.  I also knew I could not keep that pace up and enjoy the season so I really have cut back.  Next week is much simpler and I am sure I will fill it none the less with little things that make the holiday a wondrous one- but this time I will choose with care what I do.  

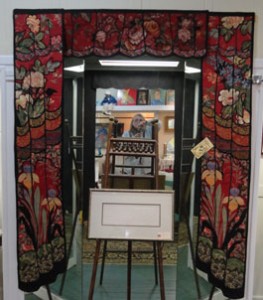
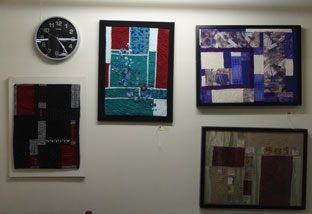
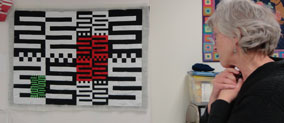
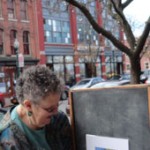
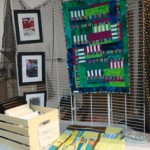
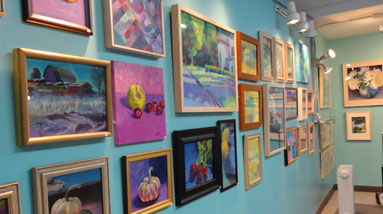
 Last Friday I helped Cheri put up a new show in her shop Imaginings Art and Antiques.  It was a delightful way to spend a winter day.  This first picture is of Alice Grant’s curtain frame fiber work.  Cheri put it around a mirror and yes that is me behind the camera in the reflection.  My work  Most of my work hung together.  For this event I am displaying only work that in a stretched or framed fashion.  The show will be up in Cortland on Maine Street until the middle of January.    It was an honor to be asked.

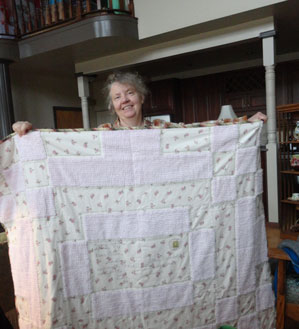
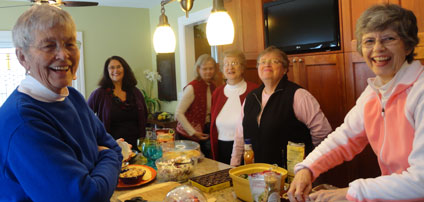
 A second event this week was the FAB meeting.  FAB is a mini group of fiber artists- and although we have agreed on the title there is still dicussion as to just what FAB stands for… could be Fiber Art Bunch, could be Fantastic Artistic Babes or any other set of words that can be Nancyplugged in. I am not going to worry about that too much, I am just glad we are getting together to grow and support one another.   Nancy was the big winner this time as she has finally completed her quilt for her daughter.  It is chinnal and flannel with a post card type message in the center to her daughter.  She even found a fabric with a stamp on it for the corner of the post card.    Nancy and the quilt are off to India for Christmas. 

 Progress Report: Flight

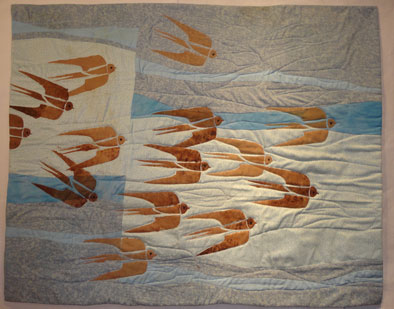
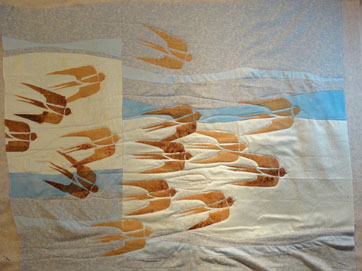
Flight 35.5" X 37.5"
Flight
35.5″ X 37.5″

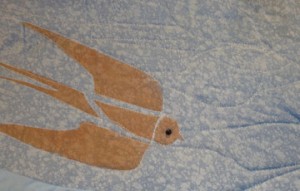
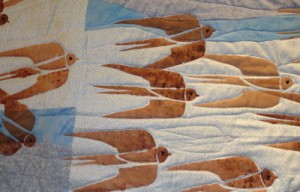
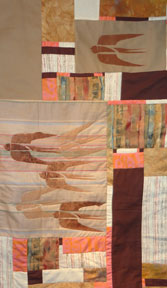
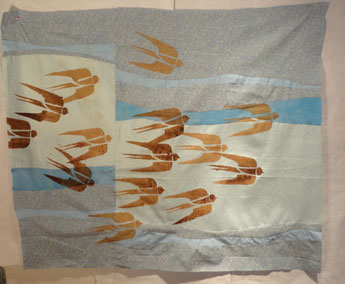
  I feel this quilt really flows across the surface.  The quilting was especially enjoyable on this work as I Flightclose-up-2added extra swallows that are in just the quilting.    I tried adding eyes on the birds with embroidery thread, but somehow that looked to flat to me so I  added black glass beads instead.    Their sparkel adds a feel of life to the work.Flightcl1 

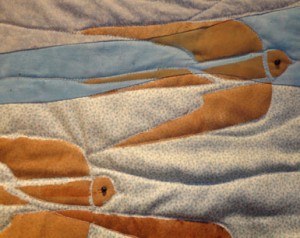
There are some quilting lines that are just flow lines that could be Flight-Close-up-3interrupted as wind or flight lines. 


This last shot shows the center of the quilt and also shows how I did not use a pure brown for the birds in some cases, but added a modeled brown to the work.


Transversing- Foundations Series IV 

Transversing  Foundation Series IV 34" X 39"
Transversing Foundation Series IV
34″ X 39″

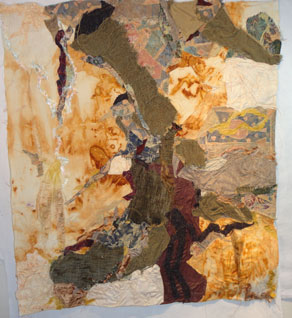
I am so very happy with how this quilt finally turned out. There are lots of different materials represented in this piece.  I showed the painted back last week.   I used some rust dyed fabric, lots of apolistory fabric, silk Transversing Cl3paper, wool and eye lash yarn on this  top.  It is fun for me to play with all the textures.

I did lots of free motion work on this one too.  I think that adds to  the flow of the work as well as holding all the fabric to the surface.

Transversing-Cl1         There are lots of little units on this work  and I feel it is one I can look at a long time.  Transverisncl2


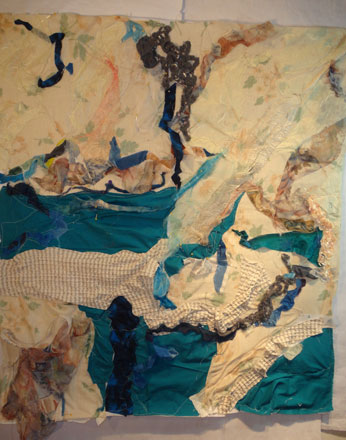
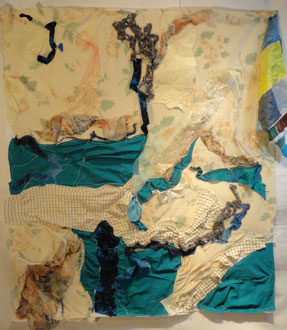
Foundations-Series-VFoundations Series V    This new member of the Foundations series still does not have a name of its own.   The images I am using has water flowing between the rocks so I think a title will come out of that the more I work with the top.    This one also has some rice paper in it.  What a different texture that adds.


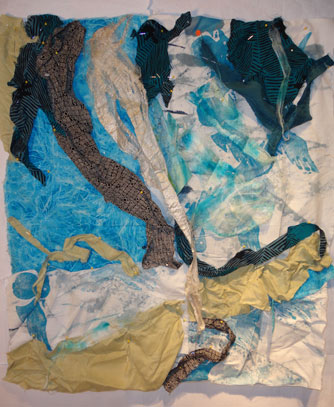
Foundations Series VI    For this one I wanted to work a little smaller-  its 28″ X 23″.new-work VI  My friend Tanya gave me some small  fabric bits last week and I really like them.  So I used them as the jumping off point for this.  The fabrics plus a second section of the water and rocks photo work well togehter.   I also used part of a silk shirt she gave me at the same time( the cream green fabric at the bottom).  This is still in the pin up stage without any stitching so it may change a lot before I get to that step.

 SWALLOWS-closeup Swallows     Last week the shot showed the quilt still in the construction stage.  I took this close up  of one of the sections as I have started to quilt it.   I am out lining the birds first and will build the rest of the quilting out from those points.   There is not full shot of this work because I dropped my camera and it landed on the barrel of the lense.   Now  the shutter will not work.  I had not put the wrist unit on and for that I am paying dearly.  I am not at all happy with this new development, but have no one to blame but myself.   I will not post next week unless I get the camera repaired.  If the cost is prohibitive I will have to ask for a new camera for Christmas.  Please keep watching.

 Daily’sdaily's     As this shot shows I am still working away on the Daily’s.     It is good to have a little daily required to work at this time of year.  That keep me on track so when I can get  back into the studio is is easier to get going again.

 My hope is that all find the joy and peace this season has to offer.

Keep Creating

Hugs

Carol


Dec 6, Holiday Happenings

generous-Liz  Hello,

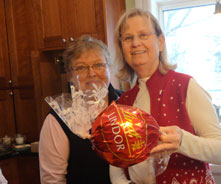
 Thanksgiving is really the beginning of holiday season for me.   The QuEG’s group started the week off with a Holiday Potluck  as a part of  our meeting.  We also added to the craziness by having a cookie exchange too.   This first shot is of Liz and our hostess Linda with the gift that Liz brought her.   We all were in top sprits and the food was great as were the cookies.BD5The-Feast

Friends always make my life full and this day was no exception.   We did the ususal show and tell and there was lots of both. Linda Chow's AlbumLinda started us off with her beautiful  Baltimore  album squares that she had unearthed when she moved.  They show  excellently exicuted hand  applique’ work on this  old project that she now feels she is ready to complete.   She suggests that doing a UFO is a good way to get back into the creative process in her new space. 

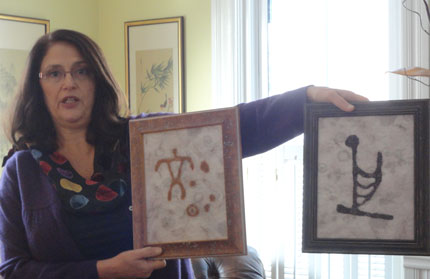
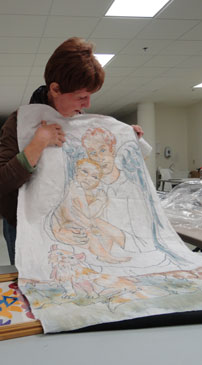
 Angela was the next power house to show her work.Angela    She is framing her felted works now and they look wonderful.   Her Hawaiian dased petrogliphits are wonderful.   She is also experimenting with felting, hand stitching and dyeing.   Sometimes in that orderis her order.  She then goes back in and stitches even more .

BD5Angela's-Experiment I really like the color combinations she is using too.  This work is also based on her petrogliphic series.

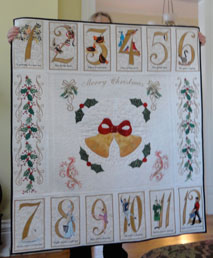
Sally's work Sally continues to blow me  away with her thread drawn  Computer / Quilt work.  She mixed  and manipulated five different programs to create this holiday quilt.   She also had some stunning little works that she had made into cards- her other specialty.   What a gal!

 Alice and-Gardians I then went off to the Quilt Diva meeting  the same evening.  Alice was a busy this last mouth and she shared four finished and one work in progress.  The work in this photo is called Guardians.  Ruth plus-work  

Ruth is continuing her work with on blocks that are based on Guyana symbols.   This symbol is used to purmote Versatility, Intensity and Dynamism.   She asked for ideas about how to quilt this work.  What a strong graphic!  I am impressed with her work.

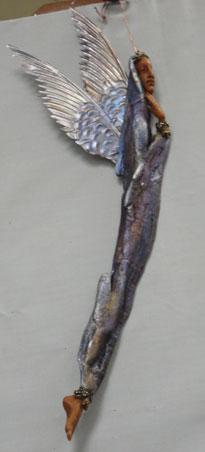
 Donna’s  busy getting ready for her solo show.  Donna's-work She is using found wood pieces and found objects as starting points for her new spirited figures series.  She says she needs to make 27 by February.  So she will be one busy gal to meet that self created challenge.

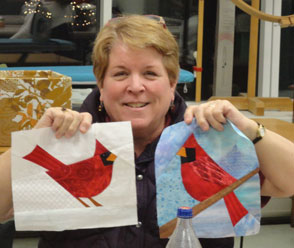
Elsie had been busy creating new bird blocks for Christmas.  I enjoy her cardinals.  They are so chipper and bright.  They really make me smile. 

Elsie

 After spending a day with all these  intense creative folks all working in their own directions,   I always go home with a mind full of new ideas and images from these two wonderful  groups of gals.  


Progress Report:    Transversing Foundations #4   Because I am not a real fan of numbering art works I now have  added to the title of this quilt.   I added lots of machine drawing  on this quilt this week and now feel it is complete.  This Painted-back of Transversing- foundations #4morning I painted the back and so that is the image presented here.    I will add the sleeve this week and the piece will be done.  Using the bobbin thread colors as my guide I tried to paint in similare  color and patters as the  front.  I know this is a lot difference, but it still works for me.  

Foundations #5   Foundations -#5  I continue to work away on this piece.  Everything here is quite fluid because so much work needs to be done on this piece before it is were I want it to be.  I did try adding  paper to the surface of this piece to get the color and effect I wanted.    I will do almost anything for the sake of texture.

FlightFlight:  This quilt was called Swallows last week. I do not think that is accurate any more so I changed it.  I am going to use that title on another piece where I used the swallow stencil on a more traditional piece.   I worked on the quilting portion of this work this week.  I am going to try to add some shadow(only machine drawn) swallows into the flight pattern to add interest and more texture.   There is one small one drawn in the lower center of the flock at the moment.  Can you find it?

  New  Swallows:    Here is the new work that will carry the Swallows title from now on. new Swallows I am still in the construction stage, but that is almost done.   I find  that I really like this stencil and may even do some more work with it.

Daily'sDaily’s – This project continues.    I have two more weeks of squares with red circles and black triangles to work with before I change the beginning lay out units. 

The season is full of visual images and lots of action.  Keep Creating.

Hugs

Carol

Tutorial- Creative Assistants

 Hello,   

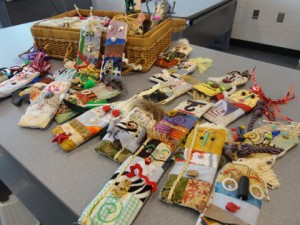
Every fall I try to add a tutorial to my blog.  This year I am adding how I create my little Creative Assistants that I give away at  the  conferences I attend.  The little pins make folks smile and create great a great way to connect with fellow creative souls. They are also a great way to use up all the bits and pieces that seem to find there way to the bottom of sewing baskets and drawers.    Have fun.

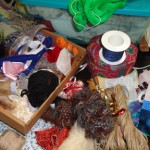
Materials list:    Scraps, card stock,  thin batting or polar fleece scraps, pin backs  .  Materials for faces: buttons, beads, little plastic or metal found objects- like paper clips, safty pins, cap liners, plastic rings, old broken bits of jewelry. ect.  For hair, yarn bits, old fur cut offs, ribbons, lace ends, scarps of leather- all of these can be used for arms too if they are a bit bigger. 

 Sewing kit( scissors, needles, thread ect) Sewing machine


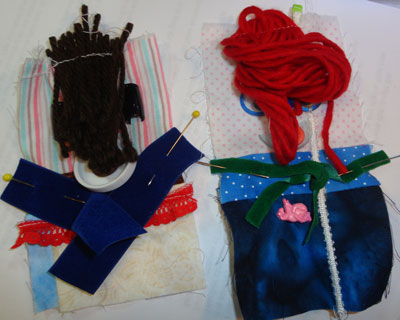
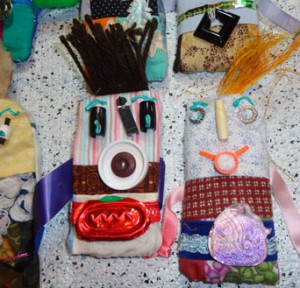
QBLCreativeAssistantsCreative Assistants     Tutorial

1.  

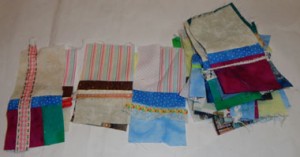
     Base: To being this project you will need your scarps.Tutorial1

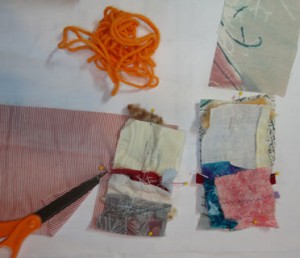
      I try to cut them down to strips that are two and a half to three inches tall –and some that are two to one and a half tall, plus a third one that is one to a half inch units.  I do not worry about being precise about this.  Then I sew all the pieces in the same size range together. The result is three long strips of the three different sizes.  I then sew the smalls strip to one of the others and trim off the excess as necessary.  The next action is to sew the two unit strip to the last strip with the slender unit in the middle.BA1tutorial3  

BA1Tutorial6     2.Sizing:  The next job is to cut the long colored strip into base units.  This is a vertical cut across the seams into three inch units.

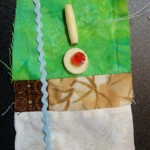
3.  Embellishment 1:  I then go to my trim and short yarn box and attach a bit of color to each unit. BA1Tutorial7 I usually do two units with each trim and then change the trim so there is lots of variety.  I sew one bit of trim vertically on a base. BA1Tutorial8 I look at the base unit and decide what will be the face area- I sew the trim below the narrow strip or across as horizontal embellishment.  Sometimes I also sew a strip vertically for a different look.

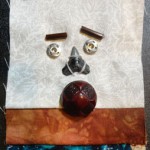
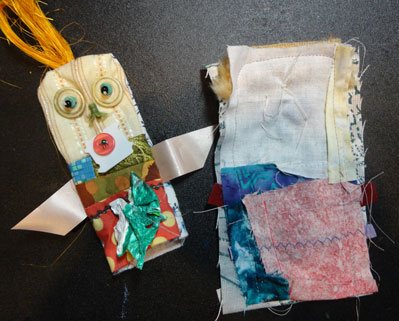
Facedfigures     4.  Faces: The next actions are done by hand:


 mouth   Mouth: The next step is to add the faces in the top or lightest area of the base strip.  One Button, bead, heart shape, bit of straw, cap, small spring, or washer can become a mouth if it is added in the lower center of the face.

    Nose:  Any longish object placed on thenose vertical can become the nose: hair pins, pen parts, bugle beads, pipe cleaner, paper clip, plastic strip, ect


-face c.   Eyes: Here you need two- one on each side of the nose. I like to put two items together to make it more fun sometimes, but that is not always the case.

      Eyebrows are optional- they can add a lot of expression though.

5.  Embellishment 2: I sometimes add old bits of jewelry or small toys to the bottom sections of some of the dolls.  I let the work guide me on this step

6.  Hair: Back to the machine.TutHair  Bits of yarn, string, ribbon, thread tangles, fur, ect is added to the top of the head area.  I loop the yarn about my fingers a few times before I sew it down.Tut-pinnedarms

     7.  Arms:  Leather scraps, cording, heavy yarns, pipe cleaners, holiday ribbon and other heavier materials become arms.  I tie a knot in the end to give the feel of hands.  I pin the arms in place and sew them just above or near the middle of the body. 


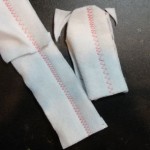
    8.  Back:   To create a back I cut six to eight  inch long strips to serve as my backs.  I place the finished body unit face down on the good side of the strip and cut it so that it is the same leanth. backs-and-pinning Then I fold up the bottom of both the back and front of the doll one fourth inch and pin.  I pin the body together and them sew around to connect the two units leaving the bottom open.


9.  Body: Clip and turn the body unit right side out.CTturned-and-readytotrun


10


10.  Stuffing:  I cut long two inch strips of card stock.  Body-stuffingThen I cut batting, polar Fleece scraps  or felt scraps two inches wide.  I create a sandwitch with the card stock in the middle and the scarps on the out sides – I  zig zag down the center of the strips.

     11.  I trim the padded strips to be just a bit shorter then the body and trim the corners that will be the top.  Then I slide the padded strips into the body and stitch the bottom closed and add a pin back to the Creative Assistant. 

     12. I then look at the dolls.  I add a bit of squeezie paint if some is needed.  For eyebrows; a extra bit of color in the mouth area; or more decoration on the bottom.  When they are dry they are done except for the signing.  Pass out to your friends and enjoy the smiles they bring to their faces.     

 Hugs 

CAROL   Creative-Assiatants-Tutoria


Thanksgiving November 28, 2013

Barbara preparing-signHello, 

 This is the time of year when we stop and give thanks.  I am so thankful for my family and friends, my good health and my chance to create  art.  Life could not be better for me then it is  and for that I am truly grateful.

The open studio on Thursday evening went well BN28dispalyand I sold one piece with a chance to sell a second.   The shop owner at Eureka talked us into being open on Saturday as well, because she says lots of folks stop on their way to the Syracuse University Ball games.  So Barbara got busy and put out a sign on Saturday.  She did really well selling over $ 400.oo worth of work.  I am happy for her.   I got a lot of button whole units created for the Blooming Bacteria quilt although I did not sell anything on Saturday.

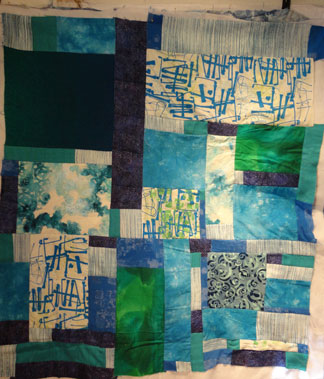
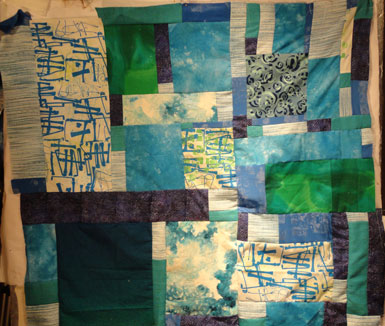
Blue Yonder 42.5" X 36" $375.00
Blue Yonder
42.5″ X 36″
$375.00

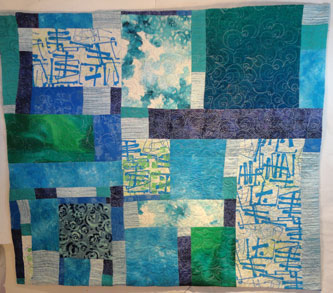
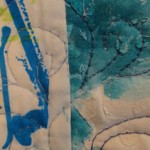
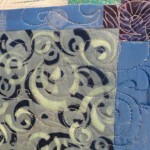
 Progress Report:  Blue Yonder This quilt is full of experiments.  I hand printed the blue images on the white last winter.  I made the screen from the curlers mom had used when she gave me a  home perm when I was a kid.    I printed the blue fabric paint on top of a white fabric that I had done a little blue crayon rubbing on first.   I also spent a day with Barbara last winter using stencils and modeling paste on fabric.  I did not know if I could stitch through it when I tried that experiment,  and  it worked.  I also added turquoise and blue paint on some of the fabric so it was not so stark.  I did some bleach discharging on the royal blue fabrics that I used on this work.blue Yonder close up 3  The fifth exeriment that is part of this quilt is the dark blue and light aqua square.  I found one  old  piece of light sensitive fabric in the package and exposed it to sun light with one of my stencils on it last summer.  That created the indigo and  pale blue part of the block. Then I used the same stencil a second time only I used  the aqua oil crayon on the stencil this time.    This piece of fabric is also were IBlue Yonder close up 1 got my idea for the quilting pattern.  The swirling pattern is not the same but very similar. 

blue Yonder close up 3


Sun Shine 20.5" X 35" $180.00
Sun Shine
20.5″ X 35″
$180.00

Sun Shine   This quilt is also an experimental project.  It is based on one of the techniques that Katie Pasquini Masopust teaches in her classes.   After adding scraps of fabric on top and giving the canvas a second paint job, I stated slicing and then zig zagging the pieces back together.  It is a scary and fun technique.  When I was  happy with the composition then I free motion quilted the work and bound it.BN28sunshcl1  I enjoyed the porcress so I think I will try it a second time.   The slicing sure adds a freedom that is not typical of the usual quilting  process.


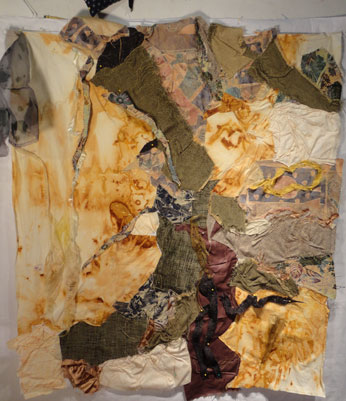
 foundations 4Foundations# 4    This is my newest highly textured piece.  It is based on a rock formation picture that I took last summer in Maine.  I have decided to change the title of the series to Foundations because no one but me sees “rocks” in the work.  It is too abstract and I am OK with that idea.  I  so enjoy the process of building up the wrinkles and adding the textures of the silk paper and  yarns.    I just let the fabric tell me what to do after I get the basic lay out pinned down.  It seems to become alive and change under my finger tips.   Building up layers of stitching lines and fabric bits is fun!  I can hardly wait from one day to the next to get back to these pieces. 

Foundations #5 foundations -5....


This one is even less defined than #4.  I am still auditioning fabrics that I might use here.  ( the pinned fabric on the right and left)  I do know that I want the leaf print to become totally lost before I am done here, so you can see there is a lot to build up on this one.

Swallows 2Swallows     A few weeks ago I made a background for Oak Leaves that did not work. Stencils The colors of the blues cashed with the greens so I made a second background and this one is the first attempt.  I was watching birds on my walk one day this week and thought that I could create a stencil and use it on this extra sky.     So when I got home I cut a swallow stencil and printed it on a bit of fabric.  It worked, so I did it on the sky.  After I have lived with it bit longer and I am sure that is does not need any more birds I will start to quilt it.

Daily’s  I am finding that I am having fun exploring new stitches as I continue to work with these little pieces.  My stitches are far from uniform, but they are fun.Dailys

I hope that the holiday was a pleasant one for all and that the turkey was delicious.

Keep Creating.

Carol

Open Studio November 21 , 2013

studio Hi ,

 Welcome to all the new followers that have signed up this week.  32 new folks were added to the  subscription list and I am quite flattered. 

 This is a shot of the Turquoise Street Studio wall with work by Beth Houston Barholdt and Barbara Vural.  They are having an open studio this eve as a part of Third Thursday.  I was asked to join them and I have work for sale as well.  I know I should have posted this bit of news last week- but I did not think of it.  I will try to keep my eye on that ball in the furture.   So as that bit of news suggests I have been busy getting ready for that event.     Tagging, matting and framing of little works really take a lot longer than their size suggests.

  On Tuesday, I went along with the other gals who are part of FAB- our mini group, to see the Quilts= Art= QuitsNancy-andVictoria at the Schweinfurth  Art Center.  We spent two hours looking and talking about the work shown there.  It is always so inspiring.  Then on the way home we stopped at  Patchwork CardsPlus and did a little shopping.  Nancy and Victoria both purchased material, while Patti and I purchased other things.  We had a good full day and I went home with my mind spinning in many directions.  

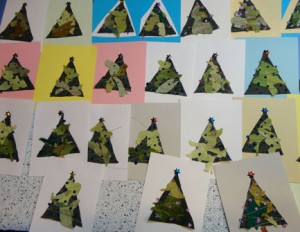
I started working on Christmas Cards this week too.  I stitched down green silk scraps from the Oak Leaves project on top of green triangles.  Then I added a star and squeezie paint balls to the trees.   It was a fun way to spend an afternoon.

Oak Leaves 45" X 30" $ 350.00
Oak Leaves
45″ X 30″
$ 350.00

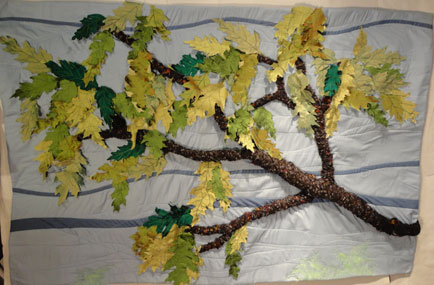
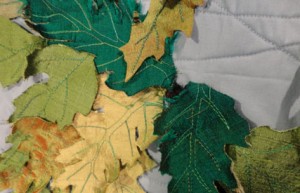
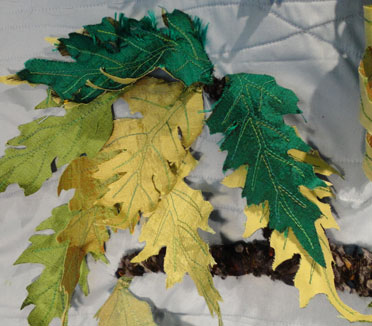
Progress Report:  Oak Leaves   This quilt is complete now.  I had shown it to the gals in FAB at the last meeting and they suggested that I add something to the bottom left hand side.  Oak close up This work hung on the design wall all week and finally yesterday morning it  hit me that what it needed was a little bit of  suggested green leaf fromation  from another  branch.  So I added it.      I really like how the silk Oak leaves close up2leaves are fraying with time on this piece.   That added texture plus the wonderful shadows created by the  overlapping leaves, especially were they cross the frapped branches,  are enjoyable to me.   I have never used silk in this fashion before and think there is more exploration for me in that direction.Oak Leaves-cl1  I do not have any more silk at the moment so it will have to stay at the dream/ imagination stage for now.

On the Raod To Dry Falls 29" X 39.5" $290.00
On the Raod To Dry Falls
29″ X 39.5″
$290.00

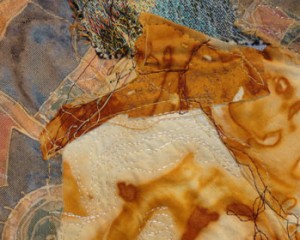
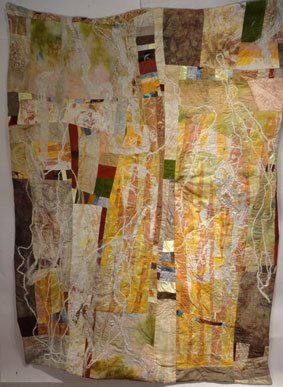
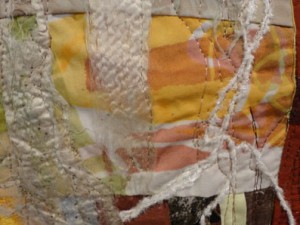
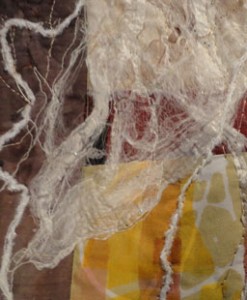
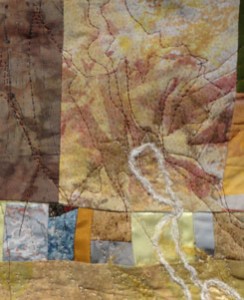
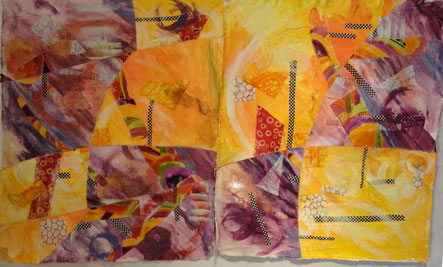
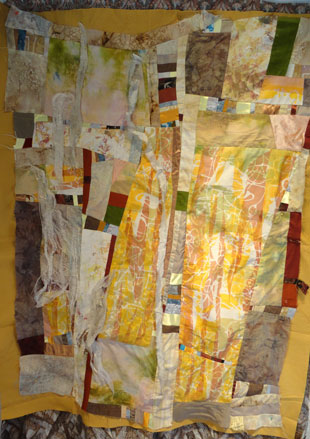
 On The Road to Dry Falls   This is the lost top that I mentioned last week.  I had started it at QBL.   I used some very old material here- the yellow, orange and white in theDry-Falls close up 1 center and left sections- and some more recently altered stuff.  The cream and green at the top on the right and lower left is from the discharged play day I did with Marty last spring.    I also used some of the silk paper on this work.  I am enjoying the process of free motion attachment of yarn( the white lines)Dry falls-close up 3 as well as the sewing/quilting lines for texture.   I am getting better at stretching the silk out to create more of a web like effect too.Dry falls close up4    

This quilt also has some hand painted fabric in it. Well that many not exactly be hand painted as this light sections is really a wipe up cloth- but I do not know how else to describe it.  Nothing is trash to me I guess.


Daily’sDaily's    The Daily’s continue to be joy for me.  This week’s collection seems to be  a mixture of crazy and control…. I am not even going to guess what that says about my mind.  There are only a few more prepared blocks using the black circles and red squares….. So there will be a change in something by next week.

  Keep Creating

Carol


November 14, 2013 Fall’s Bounty

CabbageHello,    

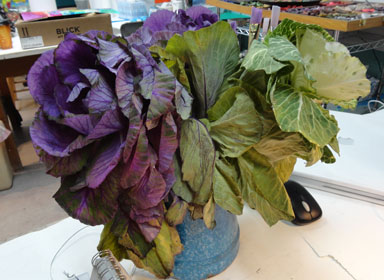
 Fall always brings a riot of color in so many ways.  Not only the trees and all their hues, but in the harvest of all the fruits and vegetables is also a color filled part of fall.   Barbara could not resist the wonderful colors of the cabbages and I love them too.  I visited her Turquoise Street Studio this week and was impressed by this wilting still life.  I can hardly wait to see the pastel that grows out of it. 

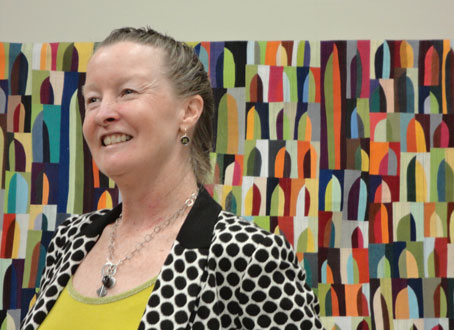
There also seems to be a bounty of events to attend in the fall.   I went to Julia Graziano’s lecture on machine quilting at the Schwienfurth on Sunday. Julia  This photo shows her in front of one of her Arches quilts,althouth this one is not in the show.  She said she did this series to learn how to sew curves.   I think she is successful.

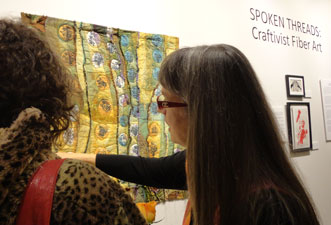
 I also went to an opening at the Art Rage Gallery this week.  The show  “Spoken Threads” displayed many different fiber and thread related work.  There were several  quilters among the many artists in this show. Sharron   Sharron Bottle Souva is shown here in a detailed talk with one of the many people at the opening.   Sally Dutko also had a piece in this show.   She made this quilt as a personal response to the shooting of the school children earlier this year.    Sally I  along with Sally and several other fiber artists  had spent an earlier part of the  day  visiting the Delevan Center  Open Studio event.  It was a very stimulating time going in and out of studios of all sorts of artist and talking with them.   Even looking at the many ways they organized themselves was an education of sorts.

VictoriaI am just home from a meeting of the “Fab” group.  Fab stands for fabric.  It is very small at the moment and we are mostly getting together to support each other and share our pursuits.  Victoria is working on these wonderful mini squares using a limited pallet of only seven colors all form the Cherry Wood collection.  The other gals in the group  gave me some encouragement about  how to improve my Oak Leaves quilt and I am going to follow through before I share it.   I am sure it will be completed by next week.

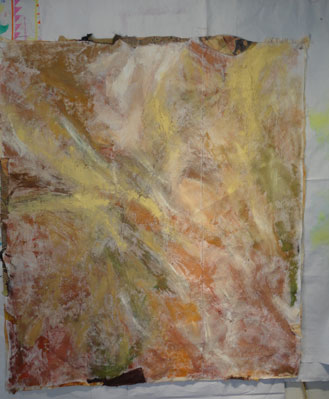
I also spent a day with my friend Cherri this week.painted-canvas  We were playing with painted canvas in a style like Katie Pasquini Masapust taught us in her workshop.   After painting the  canvas one adds fabric units and then a second coat of paint.  The next step is to place the two works on top of one another and free form cut through them both and reassembel.   This is a shot of one of my pieces at this point.  I am enjoying the process.   

       So with the visits to studios, the galleries, the lecture and the group meetings, I am enjoying the full bounty of fall.

Choosing Cherry 12.5" X18" $60.00
Choosing Cherry
12.5″ X18″
$60.00


Progress Report:  Paper Quilt – Choosing Cherry  I am delighted to say I finished this quilt after a long delay.   I was missing the filler for the biggest opening so I did not complete it.  The plastic printed images that appear green and red are from a seasonal food bag. When it appeared again this fall, I purchased the fruit and enjoyed sharing it with my friend Barbara last week.  With the bag empty, I cut it up and added it to the back of the work and completed the project.BN14CLGreatG    From the close up, it is easy to see the thread bridges and the plastic bag parts  behind them.   I had not done a paper quilt in such a long time I had forgotten how much I enjoy Carol Weib’s process.    So now I am all revved up to do another. Choosing Cherry cl 2  From the second close up one can see that I mix fabric and paper in my quilt as well as the plastic.  

 Green Nebula  This was the project that I worked on at the Turquoise Street Studio. Green-Nebula I am done with the bead work now and into the  quilting.   It a great project to carry around as there is very little material involved.

LongstitchesLong Stitches   This is a new project that I am experimenting with.  I read about doing stitches on “wash away” and them doing free motion machine work on top.  I did not have any “wash away” on hand, but had some nylon netting – so I stretched it in a hoop and did long stitches that crossed one another over and through the netting.  I then took the work to the machine and did the free motion work that the book suggested on the surface.long-stotches-with-mach   I think my solution will work for a “moss like” look on  a rock surface – my ultimate goal- and be more stable too.   I always like to alter ideas to fit my apporaches and this does that.

On-the-road-to-dry-fallOn the Raod to Dry Falls

I have finally gotten back this work too.  I started it at QBL last summer and it got put in the box with the leftover fabrics when I packed up from that adventure.  I thought I had already completed all the starts from those two weeks- but here was another.   I am ready to start doing the free motion quilting on it now and look forward to that process this next week. 

 Daily'sDaily’s   I continue to work away on the Daily’s.   I think they are getting a little more complex with time.    It is very calming work for me now too.

Keep Creating

Carol

November 7, 2013

OakHello,   

The weather is still somewhat mild here.  I find because I am working on the quilt with the oak leaves on it I am looking more at other oak trees too.  This one is in the Oak Wood Cemetery were I walk some days.  I Have noticed how different trees have differnt colorations.  This old one is  a deep red.  The one along the drive is primary yellow- but that is only at the bottom, now as the top has turned brown.  I have also observed that there are many different shapes to the leaves. I know that has to do with species differences.  Some leaves are very sharply pointed like the one in my yard and some are all curves ends.  I picked up one in the parking lot in Ithaca yesterday and not only were the ends of the leaves very curved the leaf had a really deep dip, almost to the spine, after the first vain from the base of the leaf.   Mother Nature loves variation on a theme.  I may have to get a tree book and do some serious study.  Ruth- b/w

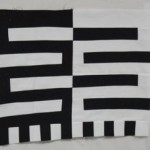
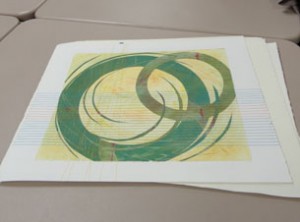
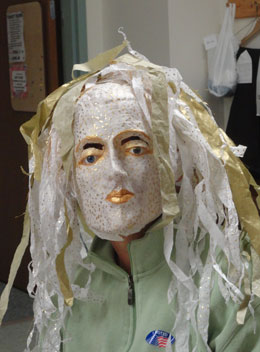
This week was the first full week of November and so I had my group meetings on Tue.   Both were very exciting.  The QUEGs group had severl members who had be to the big quilt show in Houston and they had lots of wonderful pictures and gadets to share.    The Diva’s were inspirational too.   Everyone seems to be so energized with lots to share.  Ruth is working on a project using African simbiles as the bases for the block.  This one sure is bold.  She had also Ruthcreated a wonderful study using her style of expertly mixing  batikand hand dyed fabrics. Cindy     Cindy shared her amazing prints.  She did them with the big Gelly Plate.  She is now going back into the work and adding machine stitching in top.  They are the faint red lines crossing the yellow in this photo.   The work is very elegant.Donna   Donna was kind enough to bring her Alchemist  Mask. I love masks and this one is a great one.  She built it over the old store mannequin she has in her studio.  The face is nobel.   I like the life size doll eyes she put in the face too.  They add so much in the way of focus.  Alice   Alice is working on a Human Angles series and this is one of them.  I am showing this image because she has a unique style of working were she paints the image she wants on the back of her cloth.  Then she turn it over and  lays a piece of black fabric  on top. With the two layers  together she flips the work to the back and  sews around the image she has painted.  So this picture is from the back.  She then trims the black off the front  along her seam lines and her images are outlined in black- her signature style.   It is very cool I think.      
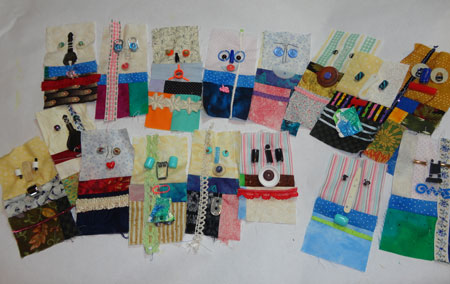
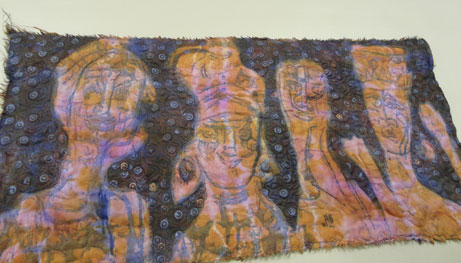
 This work with four figures is by Cheri.  I especially like the unfinished edge she used here.Cherri    They are a wonderful and inspiring group of gals who seem to be all working away in their own direction.
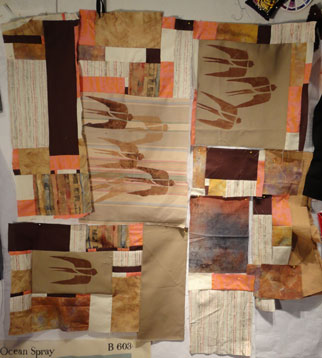
Progress Report:  Blue Yonder  This quilt is ready for quilting now. Blue-Yonder  I have done my “stitch in the ditch” step after basting.  Doing that makes the work stable for all the crazy directions I always seem to want to go.   I have not decided  what that  free motion quilting will be yet.

Oak Leaves Oak Leaves   This is a close up of the project.  I am having lots of fun making more and more leaves.  I just love how the unattached body of the leaves casts such wonderful shadows on the quilt.  They also flutter a bit when there is a breeze, like when I come in the studio door.    There is a lot of texture here and I love that. Daily's
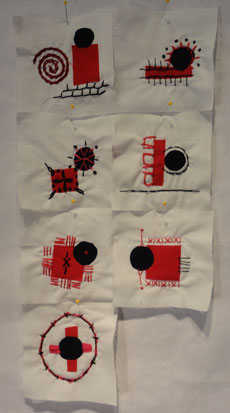
Daily’s   The Daily’s are coming along.   I now have a full cigar box of the little fellows and they are starting to look really impressive when on puts them all out.  I still have ideas of layouts for the parts and shape and color changes I want to try- so I will keep the practice up.  I also added a silly rule- no new purchases for this project.   I am almost out of red embroidery thread so I will have to switch to crochet thread- I have several huge balls of that.  I am sure that will change the character of the stitches.   But that is part of the experiment.

Keep Creating

Carol

Halloween Oct 31, 2013

Nick Hello,

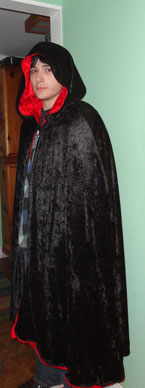
I have spent a lot of time this week preparing for Halloween and all the joys there of.  This first shot is of my grandson in his black crushed velvet cape that has a red lining of the same material.   Very dramatic to my eye and worm as well.   I did a second costume for the 10 year old grandson too, but as I have not seen him dressed in it, so I do not have a photo to share.  Let’s just say it is a very elaborate pirate costume, from a video game.     All the fun of seeing how kids portray themselves will come this eve and I do so enjoy them when they appear at my door.   It is good to try on different persona every now and then.Circeling

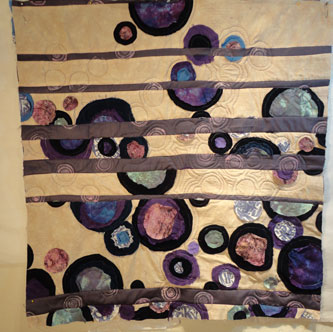
Because I spent so much time creating costumes I did not get a lot of quilt work done this week.  Progress Report: Rounds 

I am working on the quilting step of this work now.  I decided to emphasize the stamped circles and quilted around them all first.  I also filled in the rest of a circle if it was cut off in the stripping process.   Now the quilting is reflective of those first actions.   All the curves means I am moving very slowly because there is so much turning of the whole quilt as I stitch along.  I like the rail drops close up of circelingon a pool like images I am creating using this  technique.  

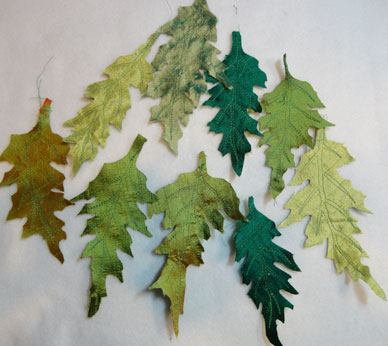
Oak Leaves  This work got some attention this week too.   I made a bunch more leaves and trimed them out for application to the surface.  Leaves The leaves are made of various shades of green Dupioni silk that is backed with green cotton.   I draw the vanes out in thread and then free hand cut the leave shapes, all the time referring to the actual leaves that I picked up last week.   I will pin them on the quilt and hand stitch them down  this week.    I seem to have lots more hand work than usual at the moment, but I enjoy that too.

 BlueYonderBlue Yonder

This work is fully assembled now.  I enjoyed the process and it did seem to change under my fingers as I worked on it.    I have created a back and will do the assemble process soon.   I am trying to clear things up from the pin wall so I can start on a new series of rock pieces.

    Daily’sDaily's4 

The Daily’s changed this week.  I did black circles and red rectangles this time.   I also watched a video on embroidery stitches on Wed and have a whole head full of stitches to try.  It is fun and a challenge- that is what I wanted so I feel very good about the process.

I hope you enjoy all the fun little visitors this evening.

Keep Creating

Carol

Creative Fiber Collage Artist Carol Boyer